This beginner crochet picnic utensil wrap is a small, useful project designed for focused beginner-friendly crochet sessions. Every section uses US terminology, realistic dimensions, and explicit checkpoints so the finished piece matches the title and intended function.
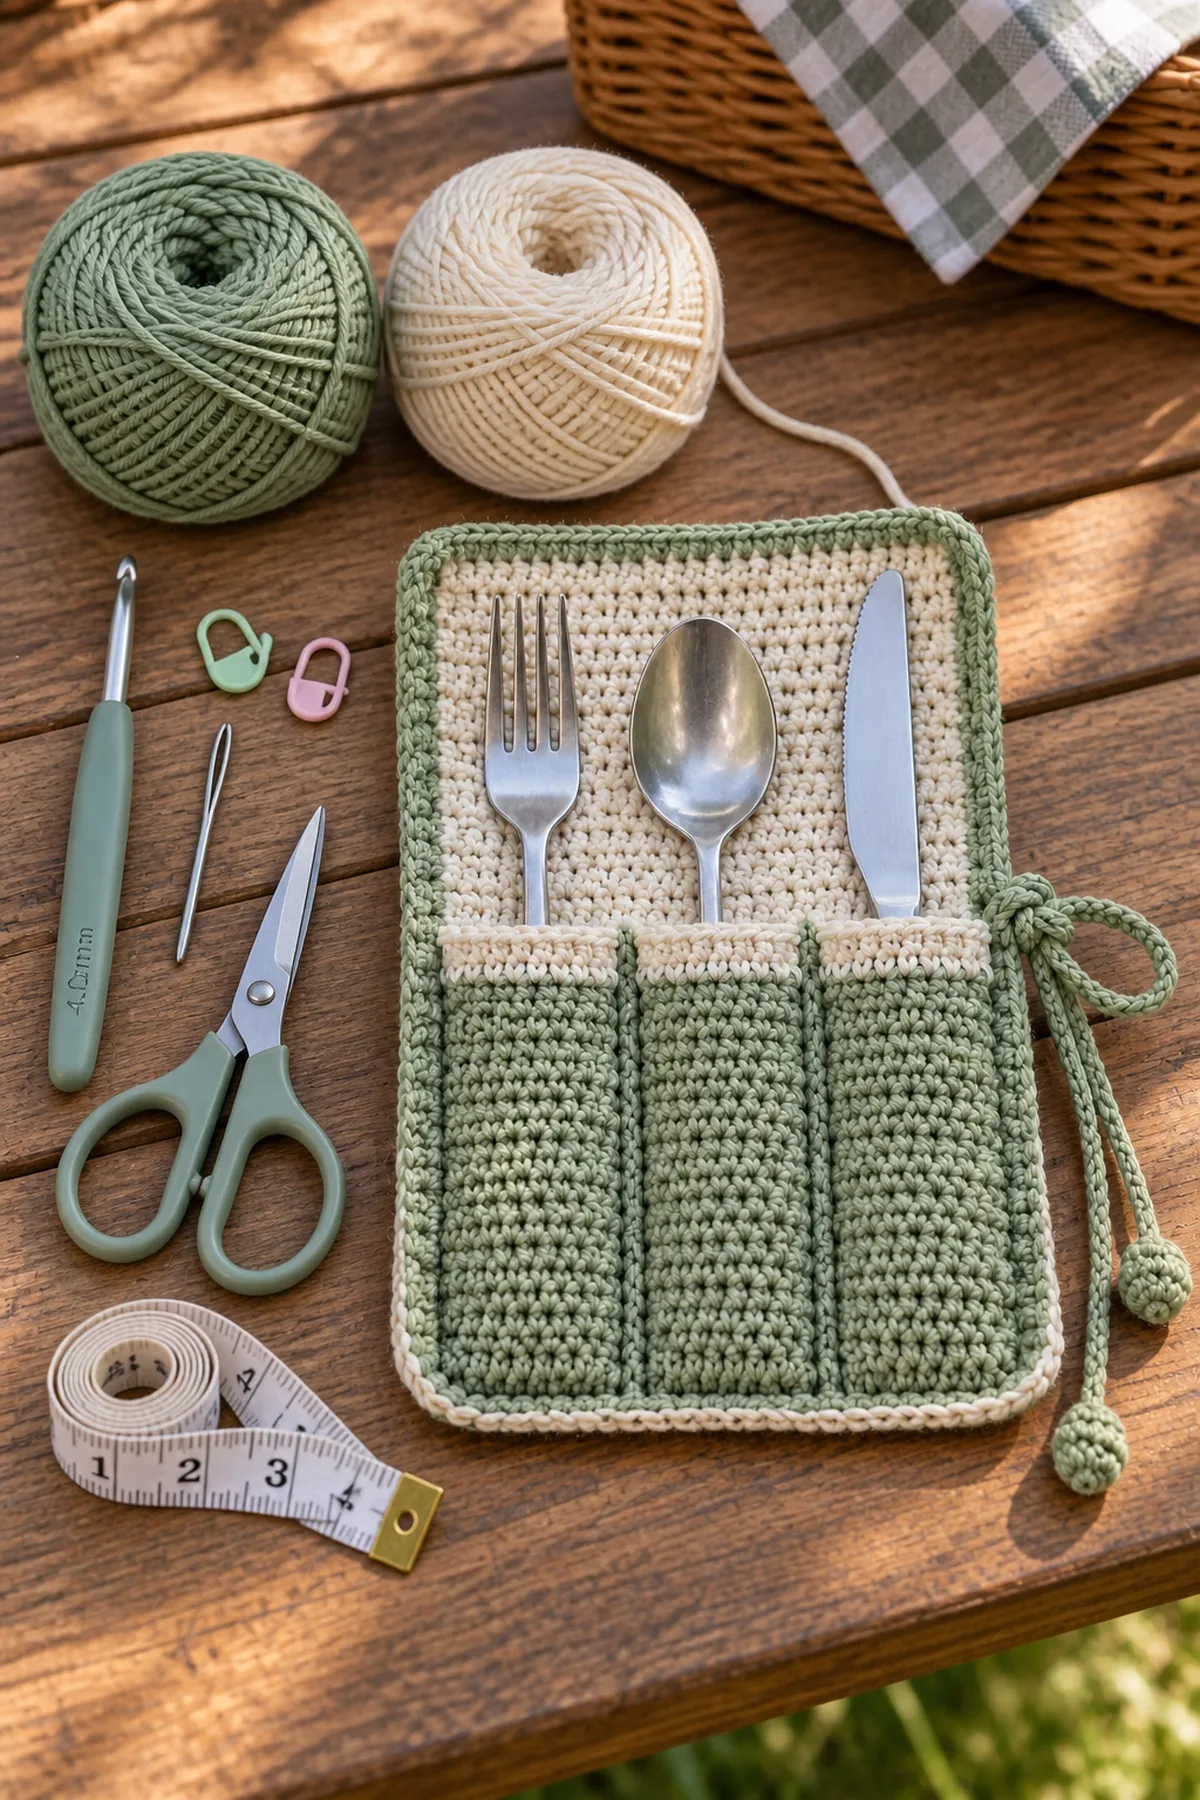
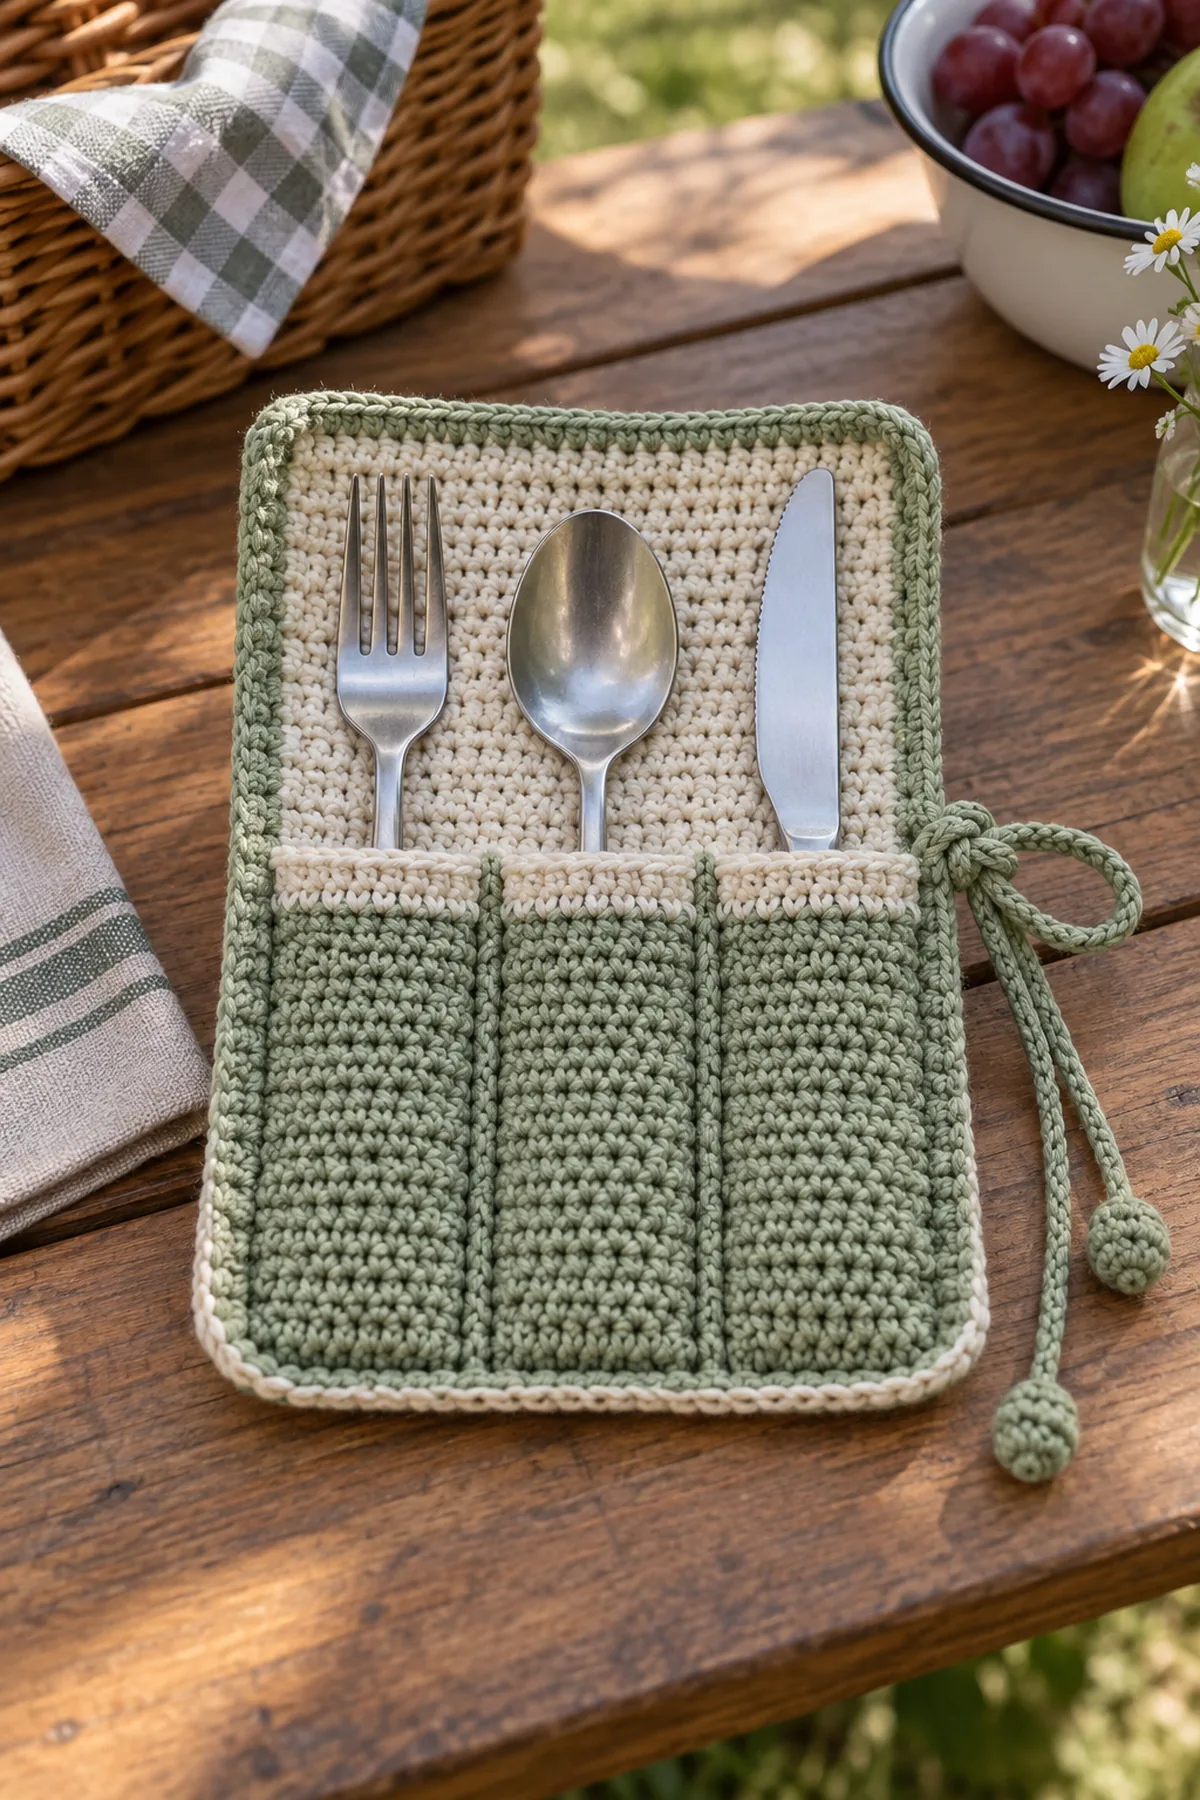
The utensil wrap construction uses a rectangular backing, three fitted pockets, and a long tie are assembled into a roll-up utensil wrap. Work the counted foundation first, check the gauge, and keep the stitch total recorded before moving to finishing.
Why You’ll Love This Project
The compact scale of this beginner crochet picnic utensil wrap makes it easy to complete without a long commitment. The straightforward repeat gives you visible progress while the final edging and blocking create a polished, useful result.
Materials
- Approximately 140 yards sage worsted-weight cotton yarn
- Approximately 40 yards cream worsted-weight cotton yarn
- 4 mm crochet hook
- Three locking stitch markers
- Yarn needle
- Scissors
- Tape measure
Gauge, Measurements, and Planning
Work 26 single crochet stitches for 18 rows to verify a 7-inch width and 4-inch height. The open wrap should block to approximately 7 by 11 inches; adjust hook size before making the pocket panel if needed.
Make and wash a gauge swatch before beginning. Measure only after the swatch is completely dry. If the stitch width differs, change hook size rather than pulling the working yarn tighter. Keep a written count at the end of every section so the finished edges remain balanced and the assembly points line up.
Abbreviations and Special Stitches
- ch: chain
- sc: single crochet
- sl st: slip stitch
- st(s): stitch(es)
- rnd: round
- row: row
Special stitch guidance: Pocket seam: whipstitch through the pocket panel and backing edge without catching the front layer. Tie cord: chain firmly, then slip stitch back through every chain.
Before You Begin
- Count at the end of every row or round before continuing.
- Beginning chains do not count as stitches unless a step says otherwise.
- Keep the fabric flat and adjust hook size if the gauge is off.
- Use the finished measurements as the blocking target.
Instructions
Crochet the Backing
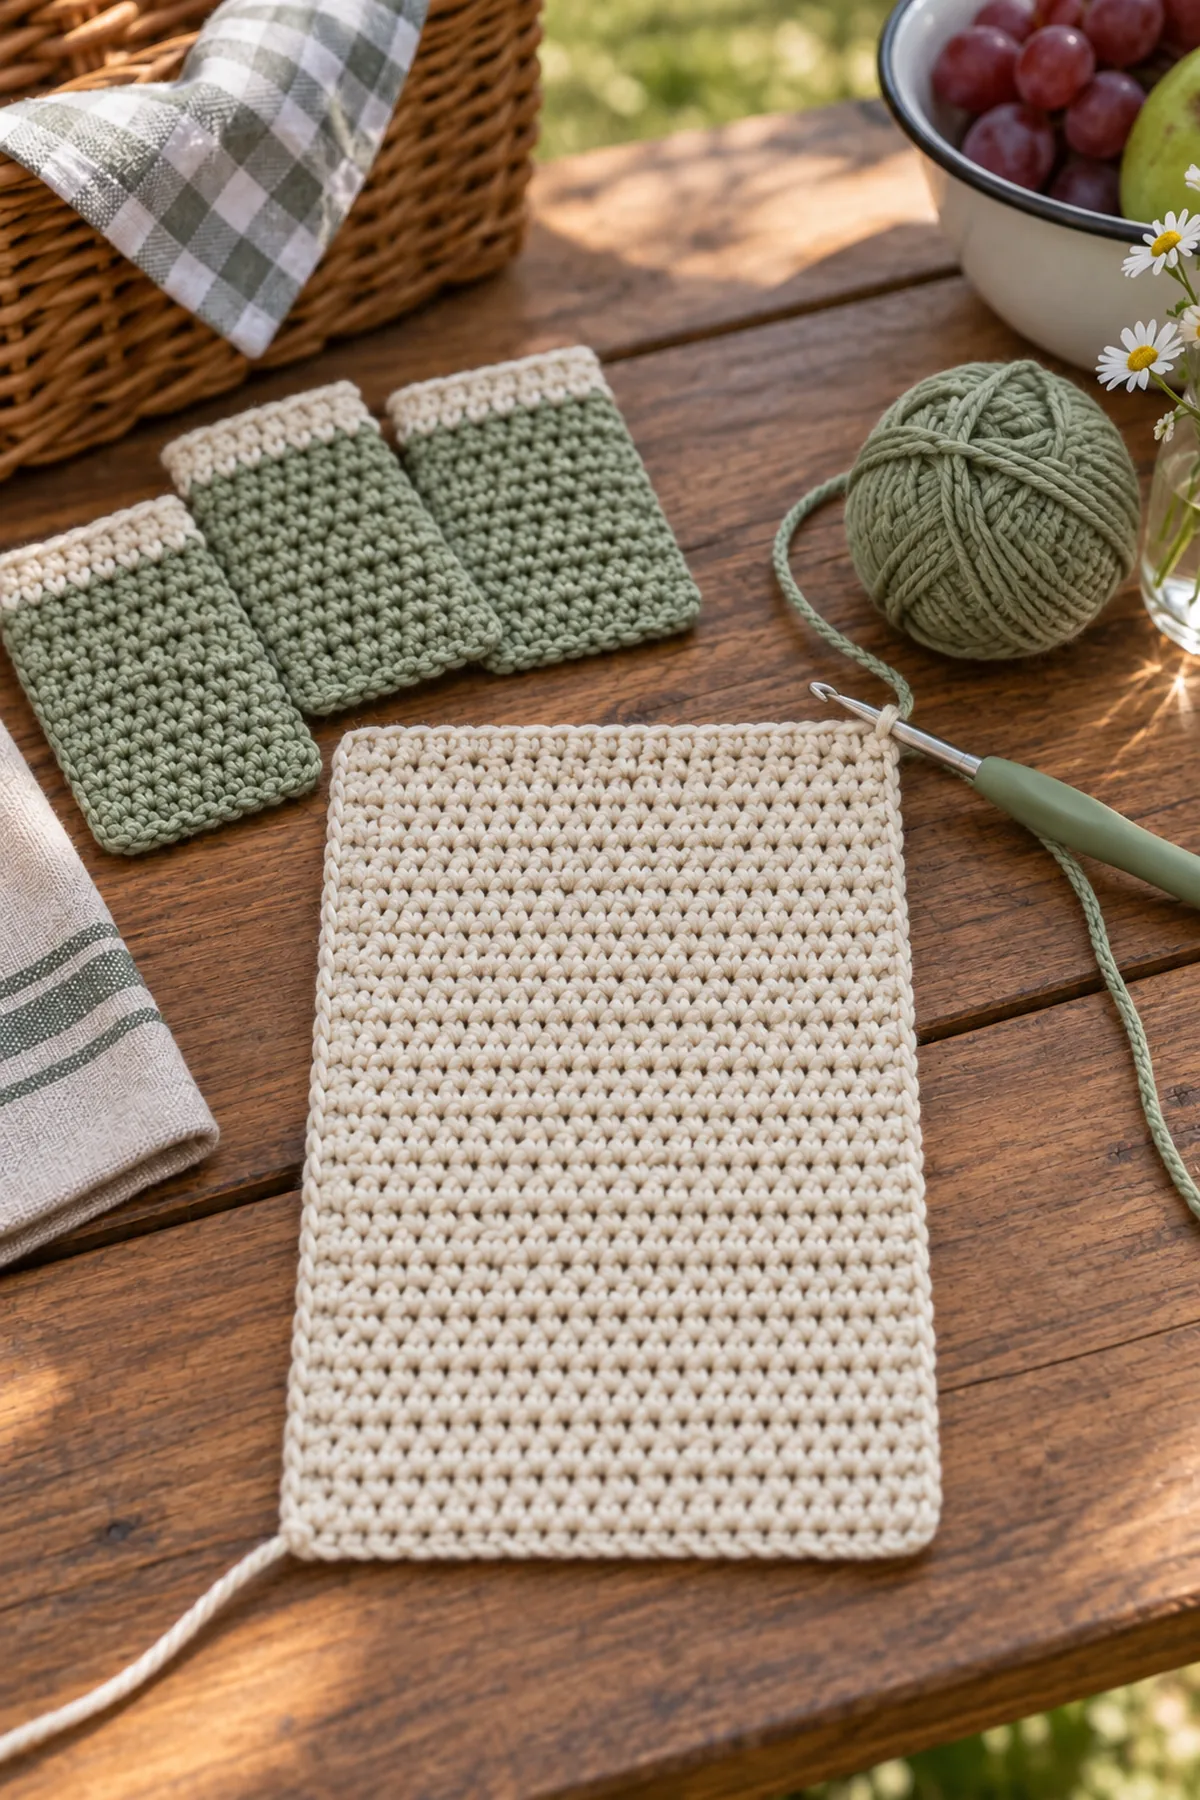
Use cream and keep both long edges straight.
- Foundation Row: Ch 27. Sc in the second chain from the hook and in every chain across. Turn. (26 sts)
- Rows 1–34: Ch 1, sc in each stitch across, and turn. (26 sts)
- Fasten off after Row 34 and block the backing to approximately 7 by 11 inches.
Make and Position the Pocket Panel
Use sage for a sturdy washable pocket layer.
- Ch 27. Sc in the second chain from the hook and across. Turn. (26 sts)
- Work 12 more single-crochet rows, maintaining 26 stitches, then fasten off.
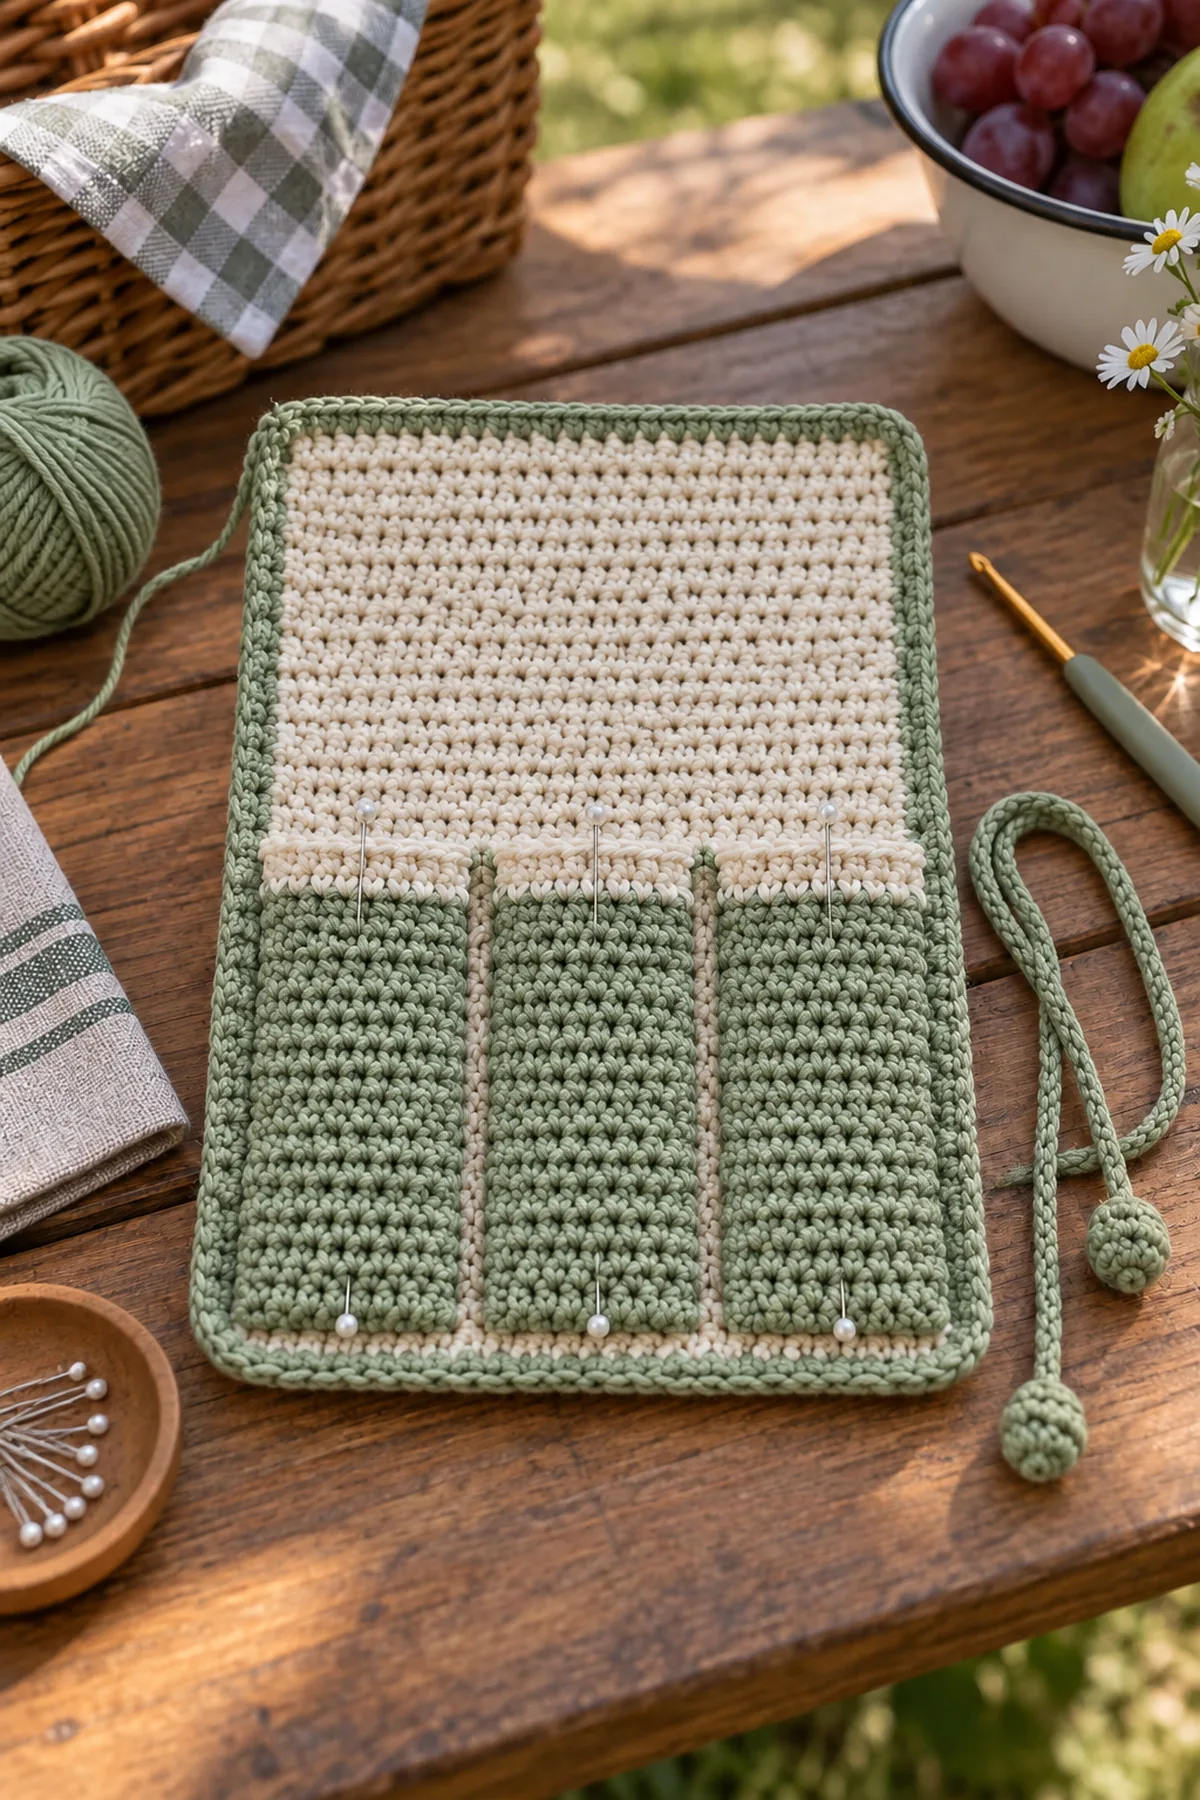
- Pin the panel across the lower 4 inches of the backing. Mark two vertical division lines after stitches 9 and 17 so the three utensil pockets are evenly sized.
Seam, Edge, and Add the Tie
Keep every pocket opening free while sewing.
- Whipstitch the lower and side edges of the pocket panel to the backing, then sew the two marked vertical divisions.
- Join sage at one upper corner and work one round of sc around the wrap, placing 3 sc at each corner.
- At the midpoint of one long edge, ch 70, sl st back through all chains, secure the cord, and fasten off.
Assembly and Shaping
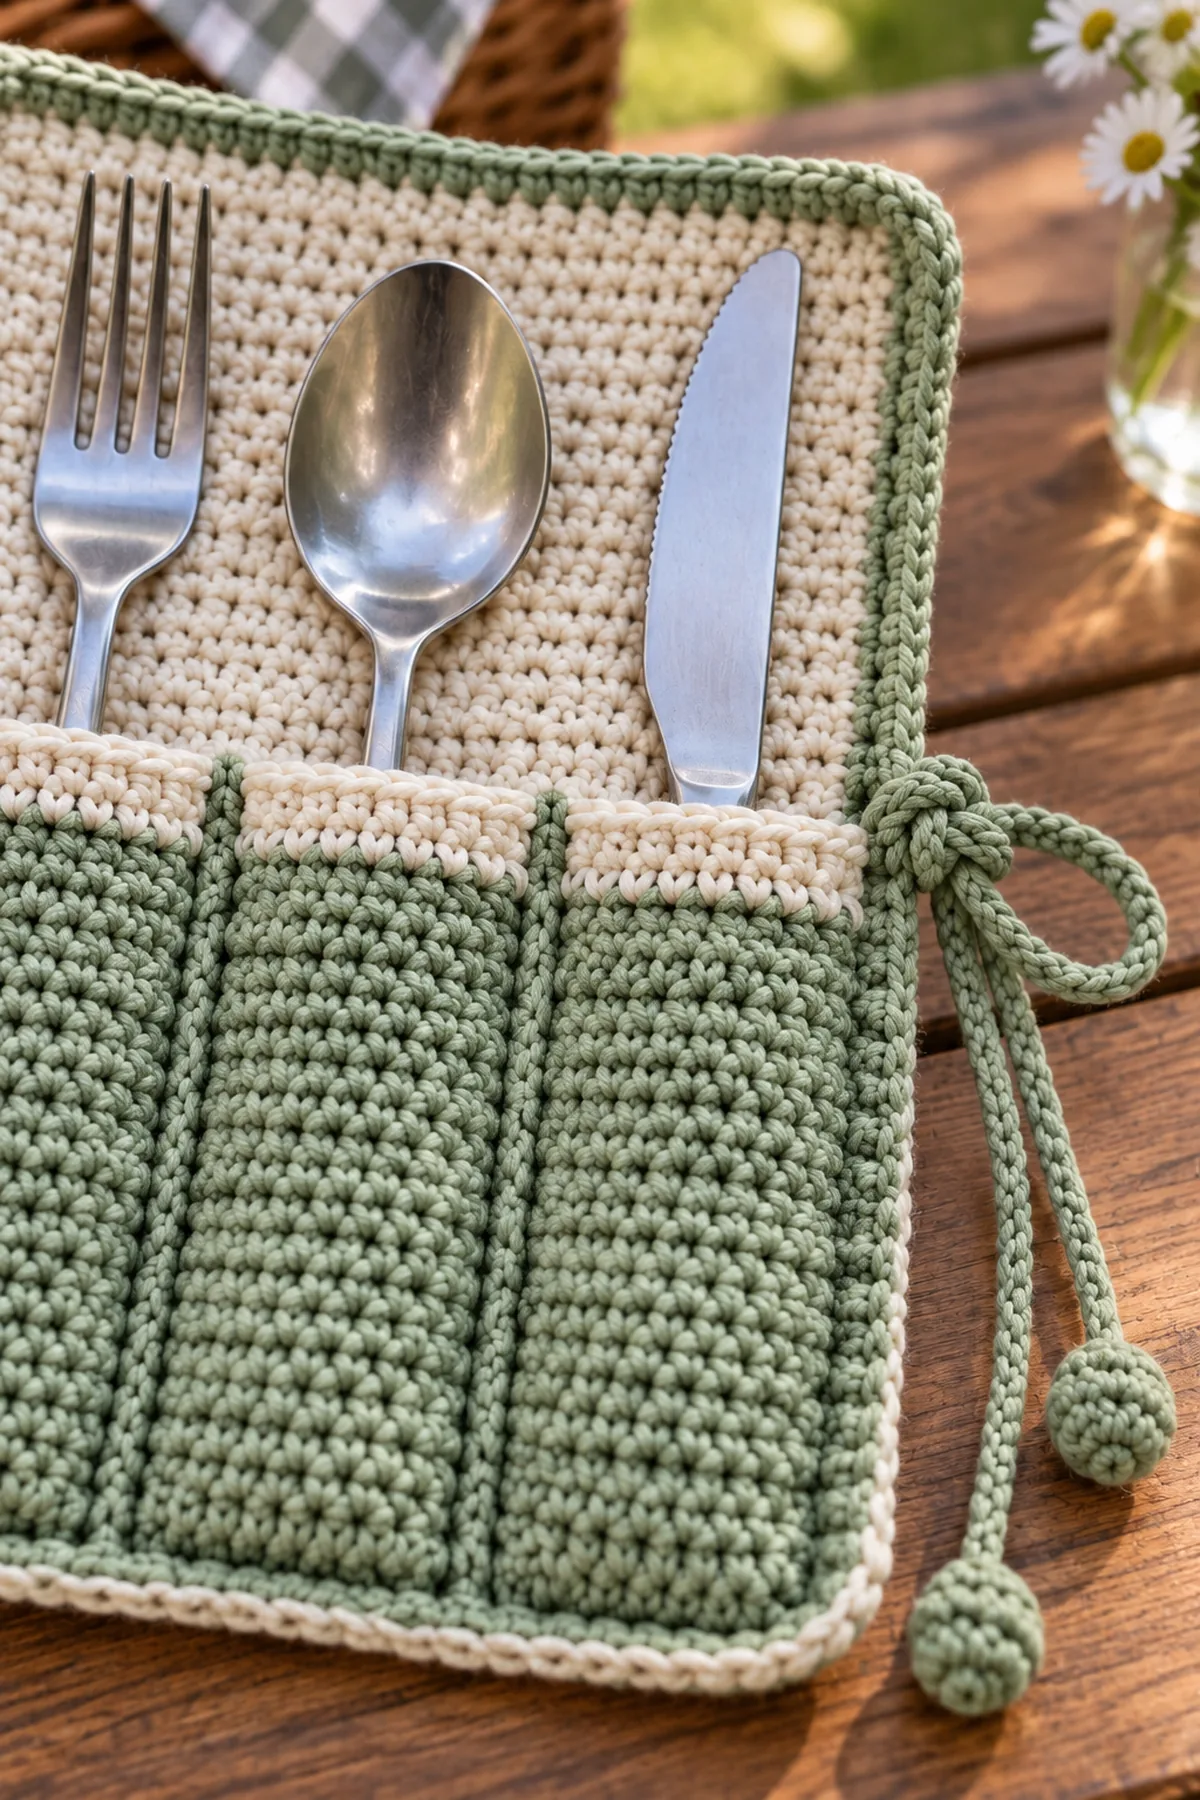
Align the 26-stitch pocket panel with the lower backing edge. Sew the outer edges first, then use the stitch-9 and stitch-17 markers for two straight dividing seams. Test the fork, spoon, and knife before securing the tie.
Lay every component on a flat surface before joining. Match the marked centers first, then divide each remaining edge into equal sections. Work through both layers with consistent tension and pause after each section to check that the fabric lies flat. This measured approach prevents twisting and keeps decorative details facing the intended direction.
Finishing
- Weave each tail through several matching stitches and reverse direction once.
- Block or reshape the project to the listed finished measurements.
- Inspect the border, corners, joins, and any closure before use.
- Trim the tails only after the fabric is completely dry and stable.
For a polished result, weave each tail through several same-color stitches, reverse direction once, and trim only after the fabric has been gently stretched. Block to the listed dimensions without flattening textured stitches. Inspect joins, borders, straps, and decorative pieces before the project is used or gifted.
Helpful Tips
- Use a contrasting marker to make the first stitch easy to find.
- Photograph or note the stitch count at each checkpoint.
- If the edge ripples, check for accidental increases; if it cups, loosen tension or increase hook size.
- Cotton yarn is ideal for small home and table projects because it is firm and washable.
Good lighting and a contrasting stitch marker make counting much easier. If a section looks uneven, compare the current count with the previous checkpoint before continuing. Fixing one missed stitch early is faster than compensating later, and it preserves the measurements used by the assembly instructions.
Frequently Asked Questions
Can I change the size?
Yes. Add or remove complete repeats while keeping increases and decreases evenly balanced, then update the finished measurement.
What yarn is best?
The pattern is written for 180 yards worsted-weight cotton yarn. A similar smooth yarn can work, but check gauge and expect the finished size to change.
How should I wash it?
Follow the yarn label, reshape while damp, and dry flat so the edges and corners remain even.
Conclusion
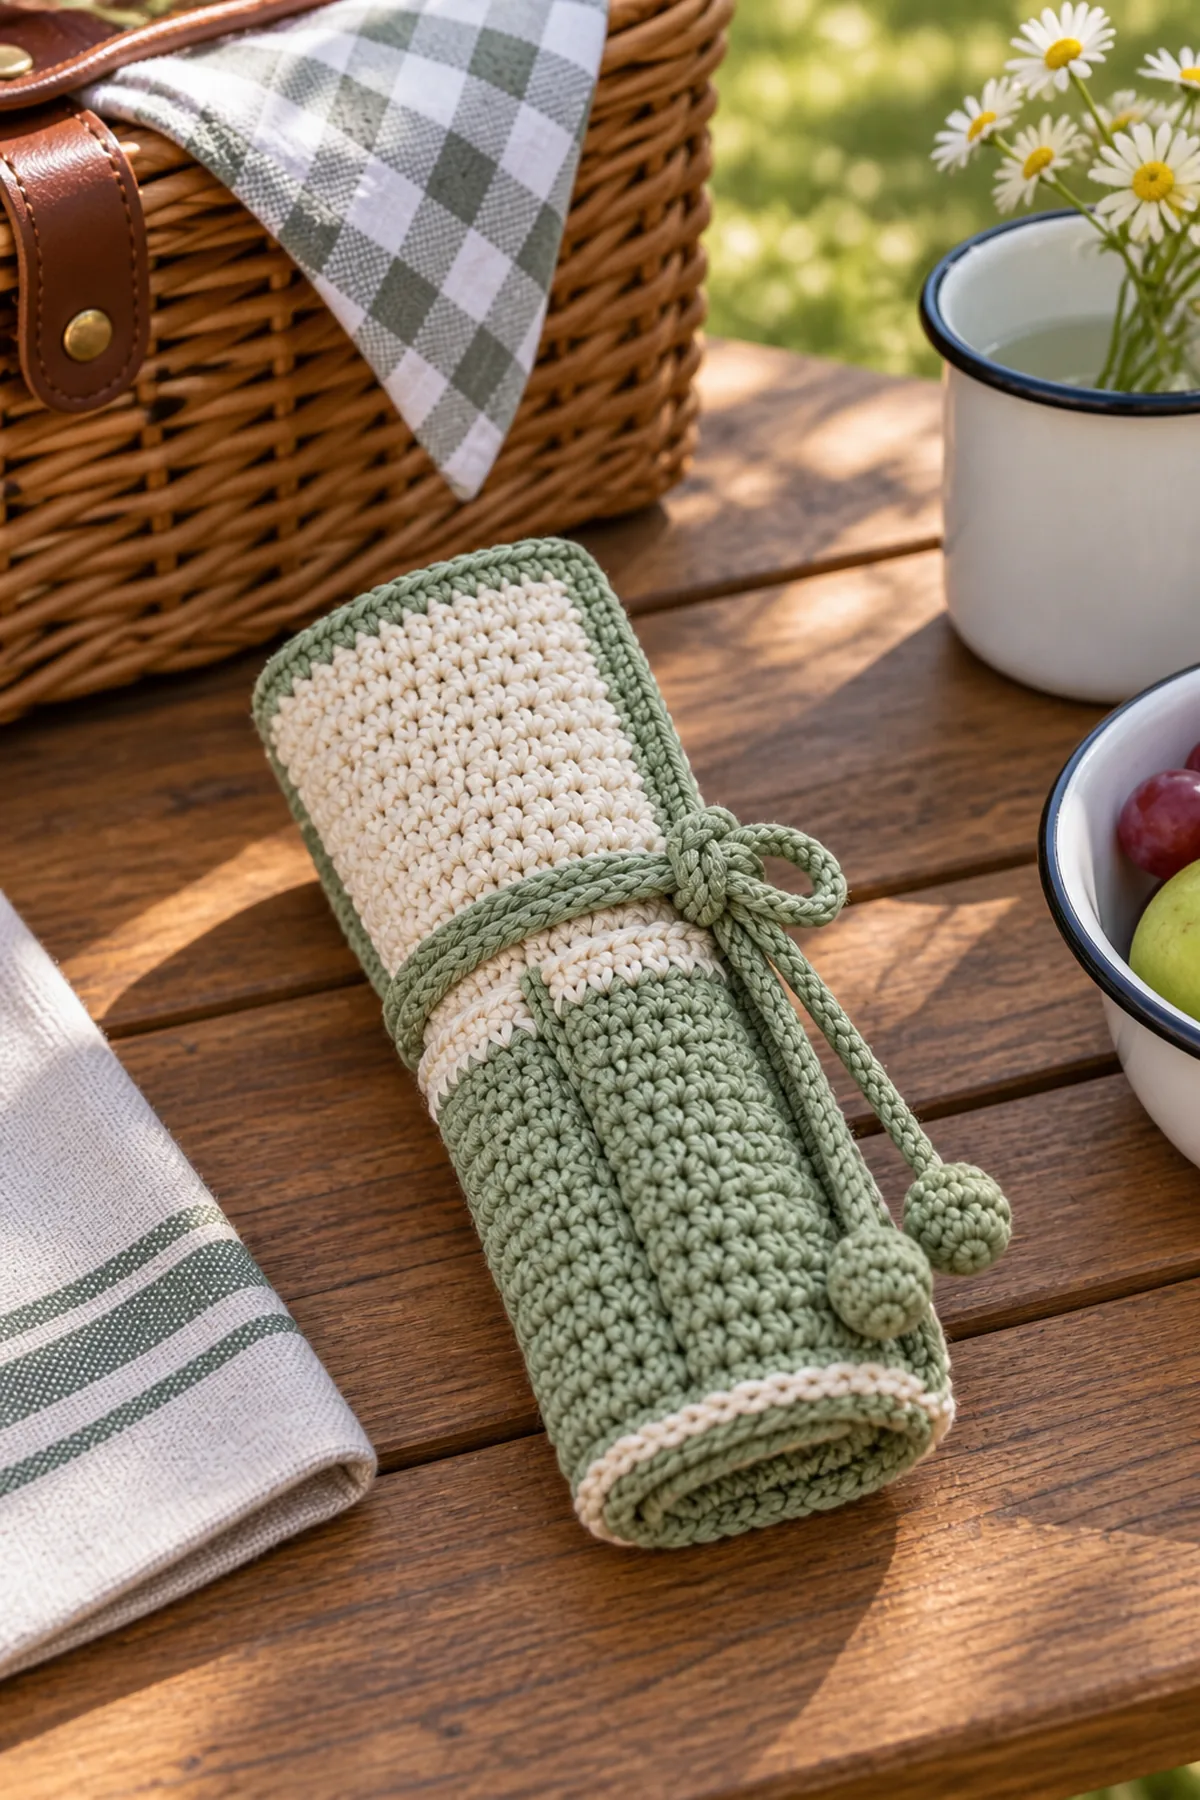
The finished picnic utensil wrap should hold three pieces of flatware securely, roll without bulk, and close with its attached tie. Cotton yarn and reinforced pocket seams make it practical for repeated outdoor use.
Printable Crochet Pattern Card
Project: Beginner Crochet Picnic Utensil Wrap
Skill level: Beginner Hook: 4 mm Yarn: Worsted
Finished size: Approximately 7 by 11 inches open
Card Materials
- Approximately 140 yards sage worsted-weight cotton yarn
- Approximately 40 yards cream worsted-weight cotton yarn
- 4 mm crochet hook
- Three locking stitch markers
- Yarn needle
- Scissors
- Tape measure
Card Instructions
- Crochet the Backing: Make a 26-stitch cream backing for 34 rows and block it to 7 by 11 inches.
- Make and Position the Pocket Panel: Crochet a 26-stitch sage panel for 13 rows and mark three pocket sections.
- Seam, Edge, and Add the Tie: Seam three pockets, add a sage border, and attach a 70-chain tie at the side midpoint.
Finish: Check every count, weave in all ends, block to measurement, and inspect each join.