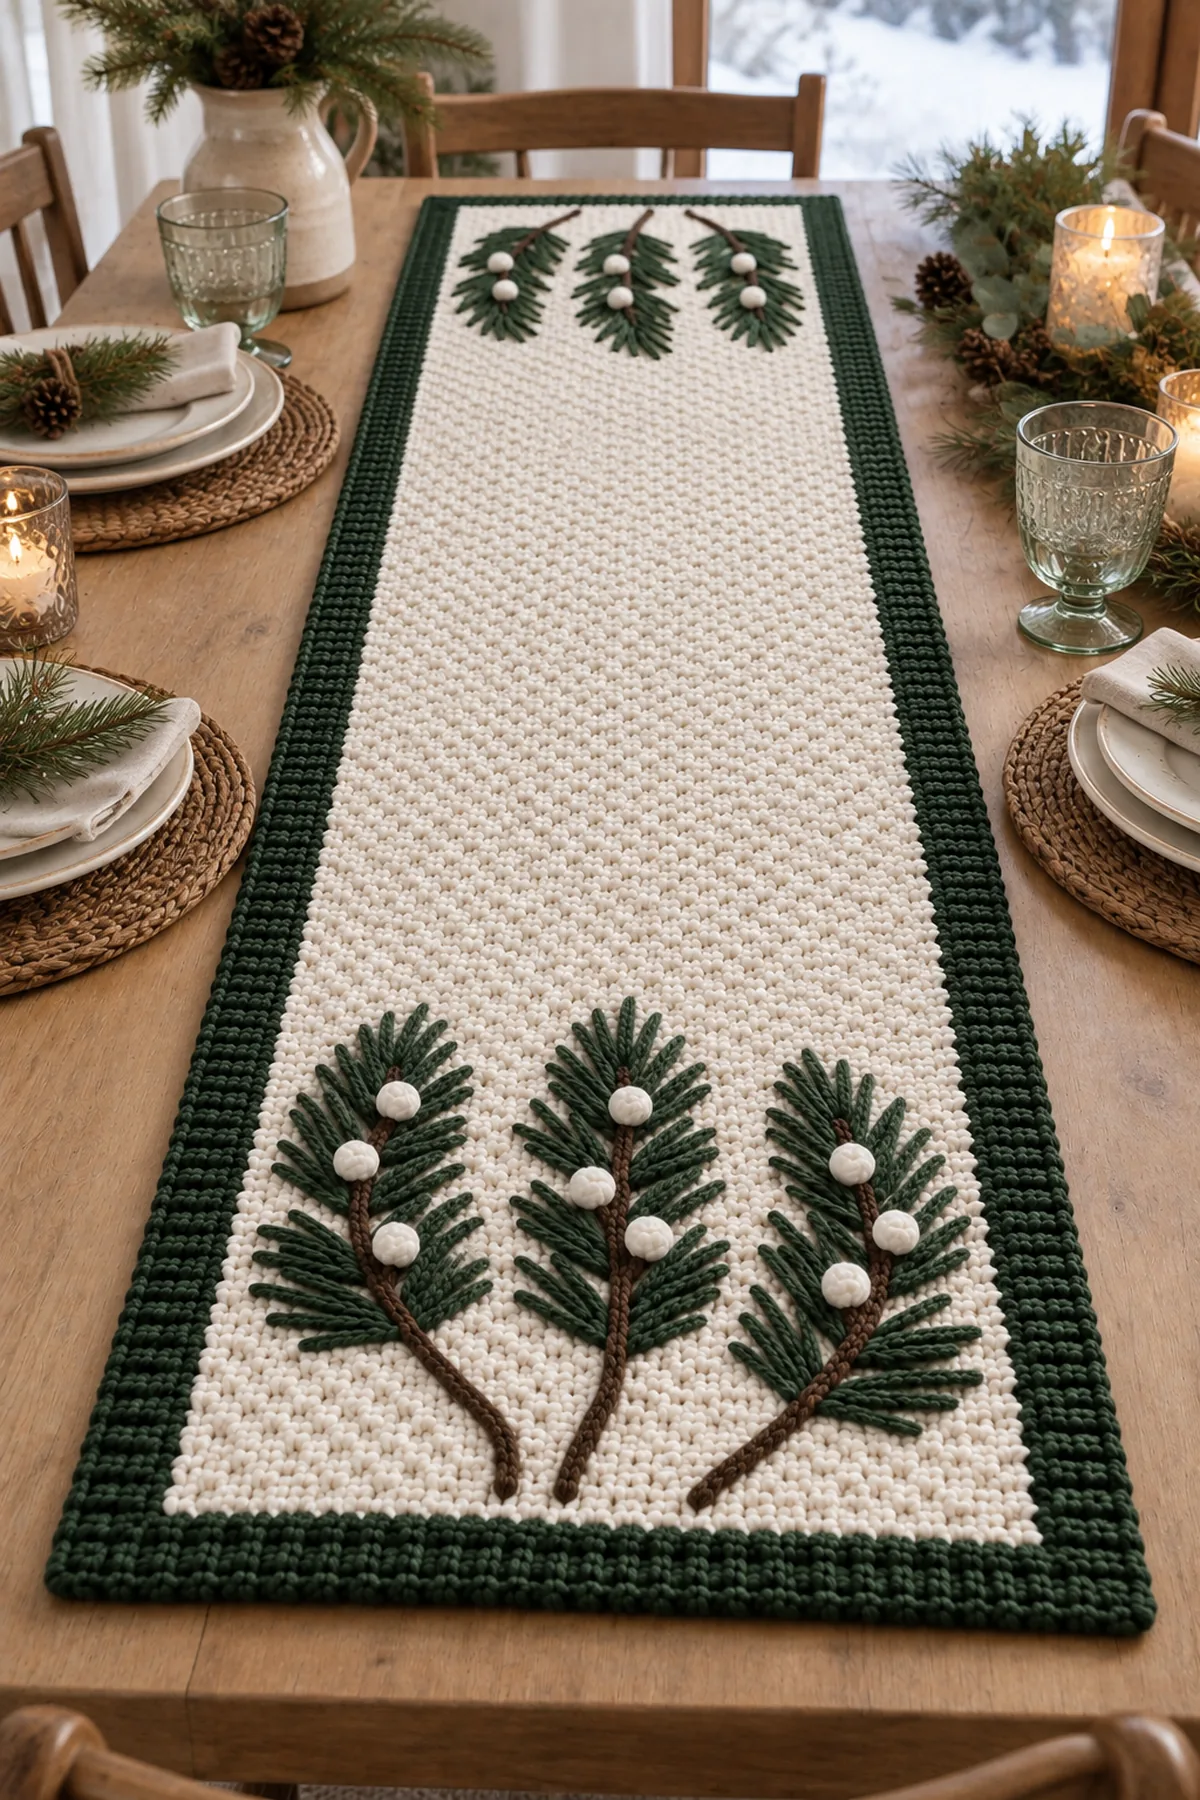
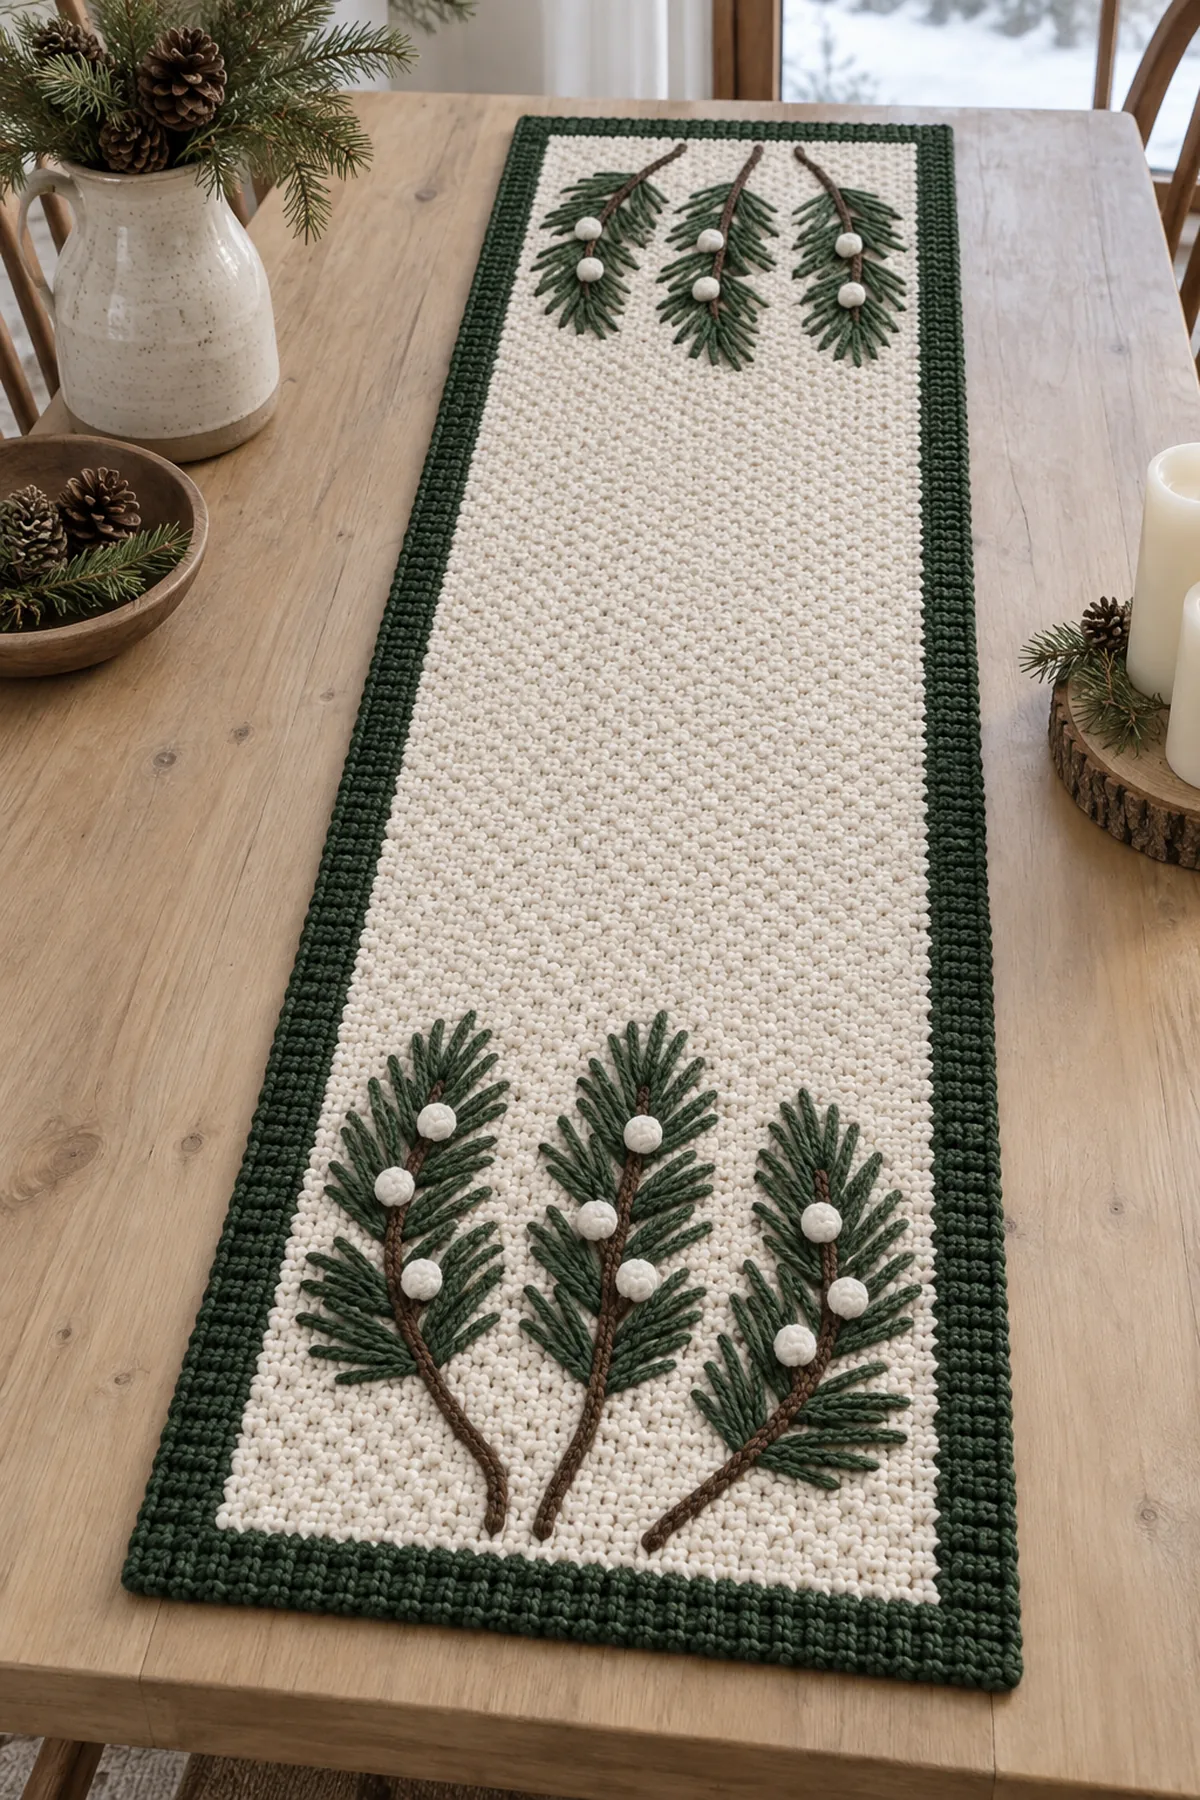
This crochet winter pine branch table runner uses a quiet ivory moss-stitch field as the background for six sweeping evergreen sprigs. Brown surface-crochet stems, clustered green needles, and small white bobbles create a snowy botanical design without relying on separate flower motifs.
Work a 51-position moss-stitch rectangle for 156 rows. Add a dark-green ribbed border, surface-crochet six curved branch stems, attach counted needle clusters along each stem, and finish with eighteen white snow bobbles.
Why You’ll Love This Project
Moss stitch keeps the runner flexible and flat, while surface crochet lets each branch follow a natural curve. The branches can be assembled in small sections, and the subtle winter palette works beyond the holidays.
Materials
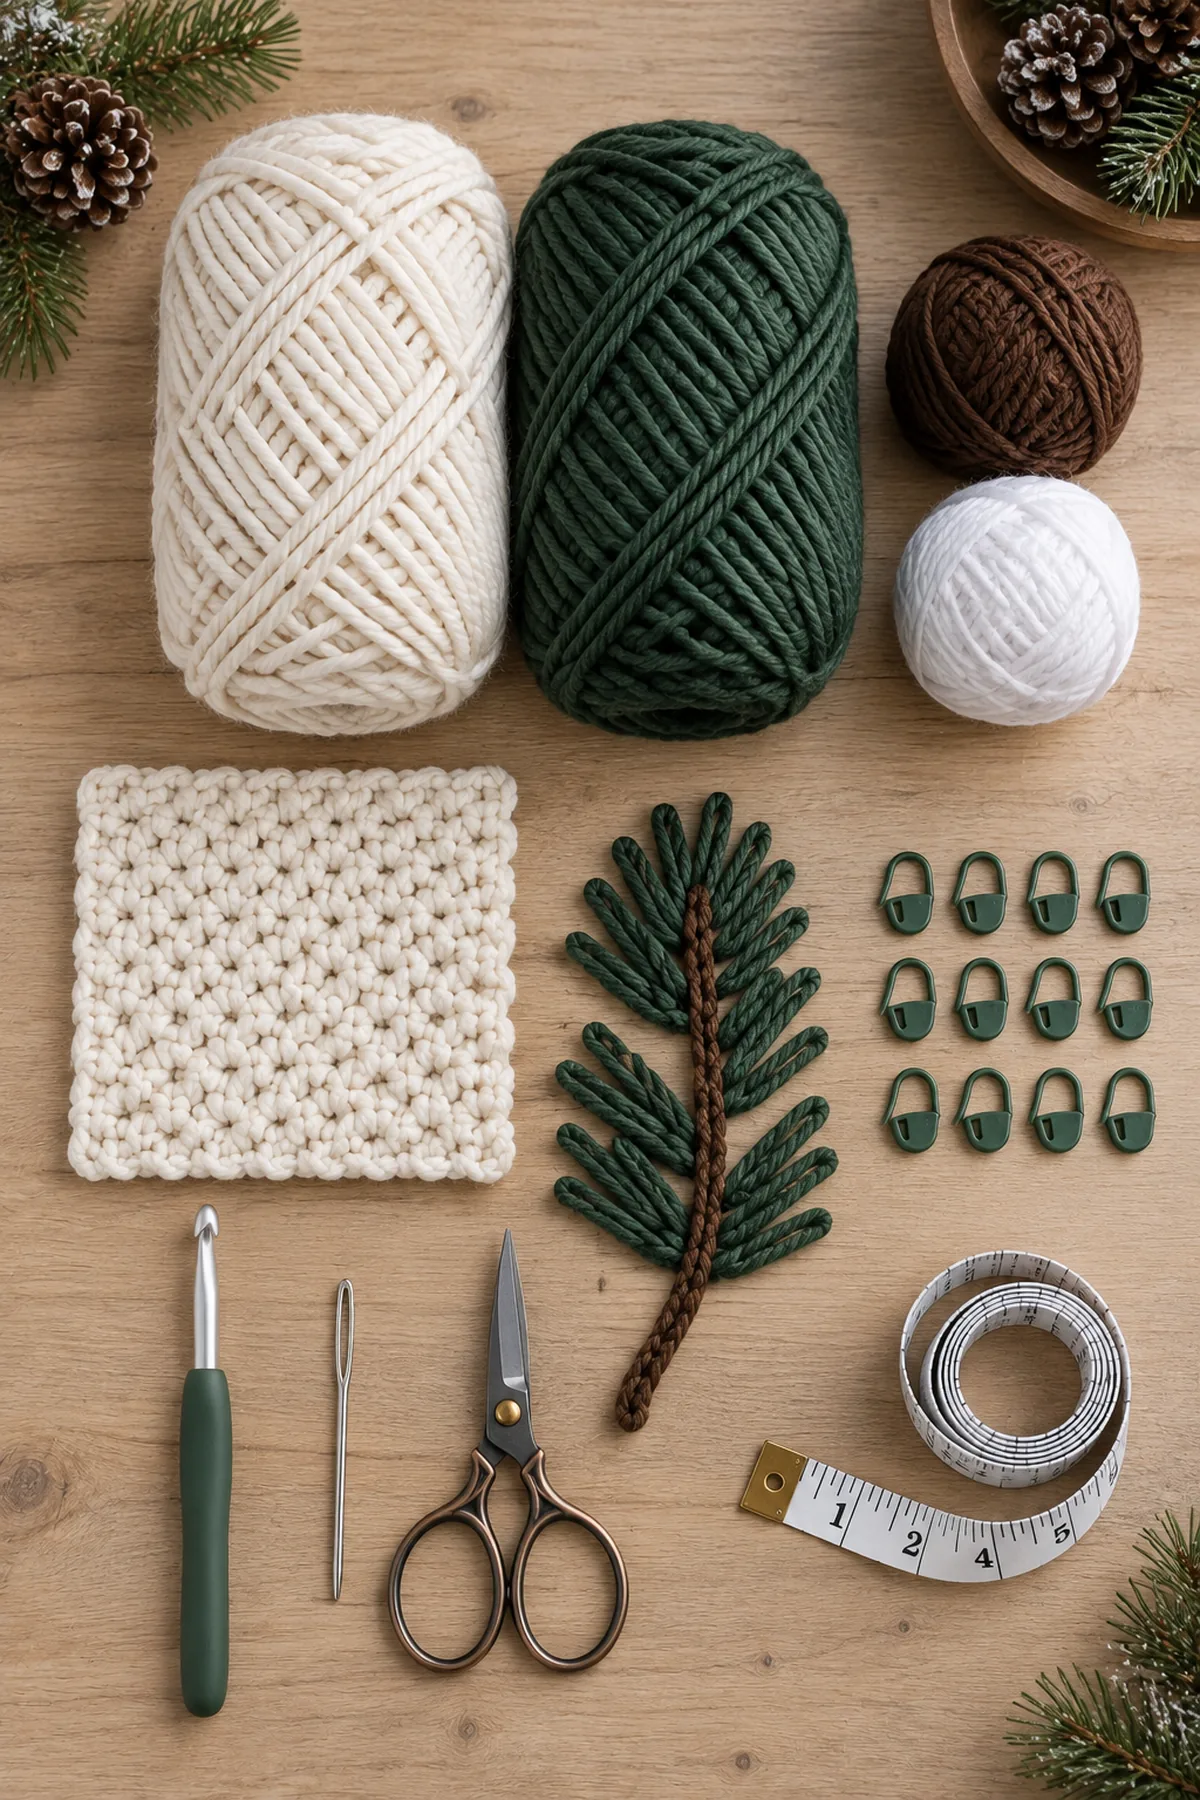
- Approximately 760 yards winter ivory worsted-weight cotton yarn
- Approximately 210 yards forest-green cotton yarn
- Approximately 45 yards dark brown cotton yarn
- Approximately 35 yards bright white cotton yarn
- 4.5 mm crochet hook
- Twelve locking stitch markers
- Yarn needle
- Scissors
- Tape measure
Gauge, Measurements, and Planning
Thirty moss-stitch positions should measure 8 inches and 26 rows should measure 8 inches. The 51 positions establish the width, while 156 rows and the border establish the 50-inch length.
Make and wash a gauge swatch before beginning. Measure only after the swatch is completely dry. If the stitch width differs, change hook size rather than pulling the working yarn tighter. Keep a written count at the end of every section so the finished edges remain balanced and the assembly points line up.
Abbreviations and Special Stitches
- ch: chain
- dc: double crochet
- hdc: half double crochet
- sc: single crochet
- sl st: slip stitch
- st(s): stitch(es)
- BLO: back loop only
- yo: yarn over
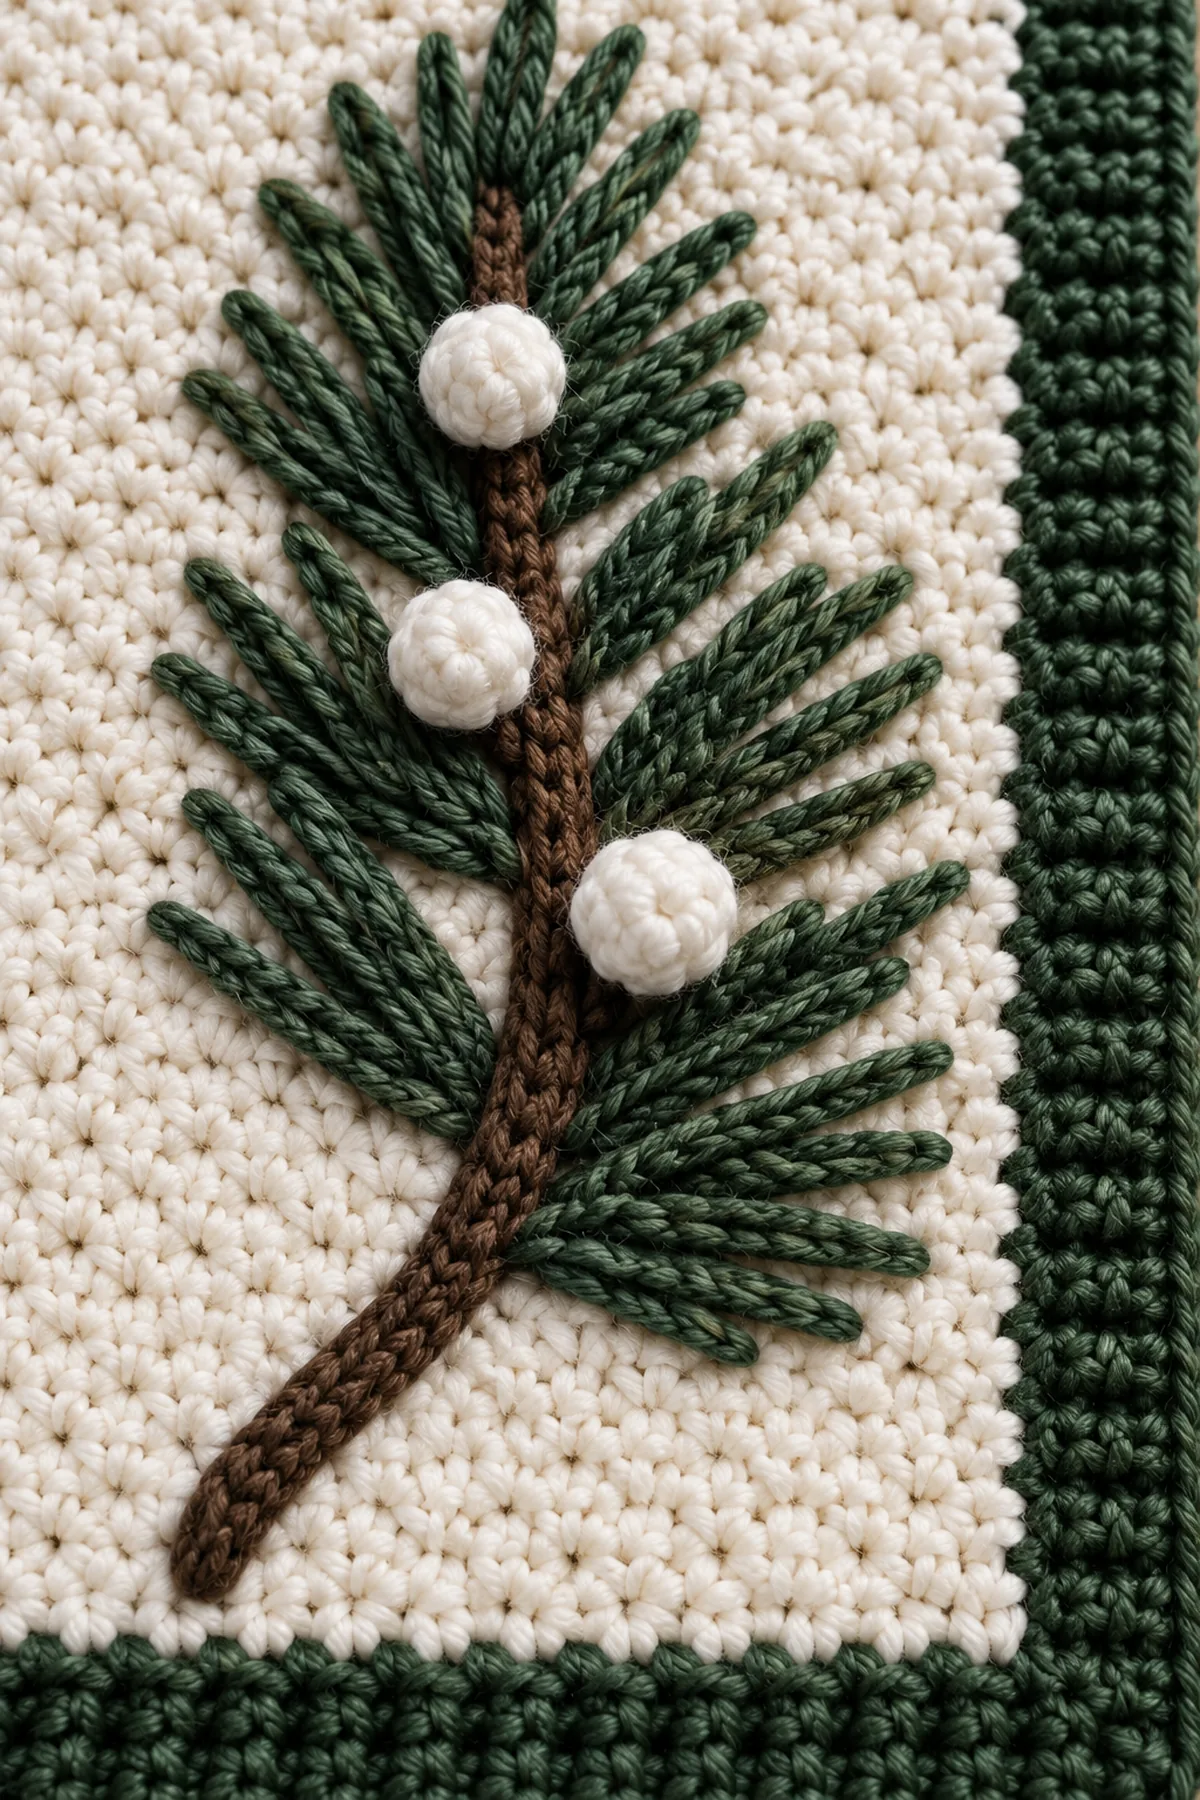
Special stitch guidance: Moss stitch: sc in the next chain-1 space, ch 1, and skip the next sc. Pine-needle cluster: chain 7, slip stitch back through 6 chains, then repeat twice from the same anchor. Bobble: yarn over, pull up a loop and complete four partial double crochets before closing all loops together.
Before You Begin
- Every moss-stitch row contains 51 counted positions.
- Mark branch paths on the blocked base before working surface stitches.
- Keep pine-needle chains loose so they lie flat instead of curling.
- Attach snow bobbles after all branch stems and needles are complete.
Instructions
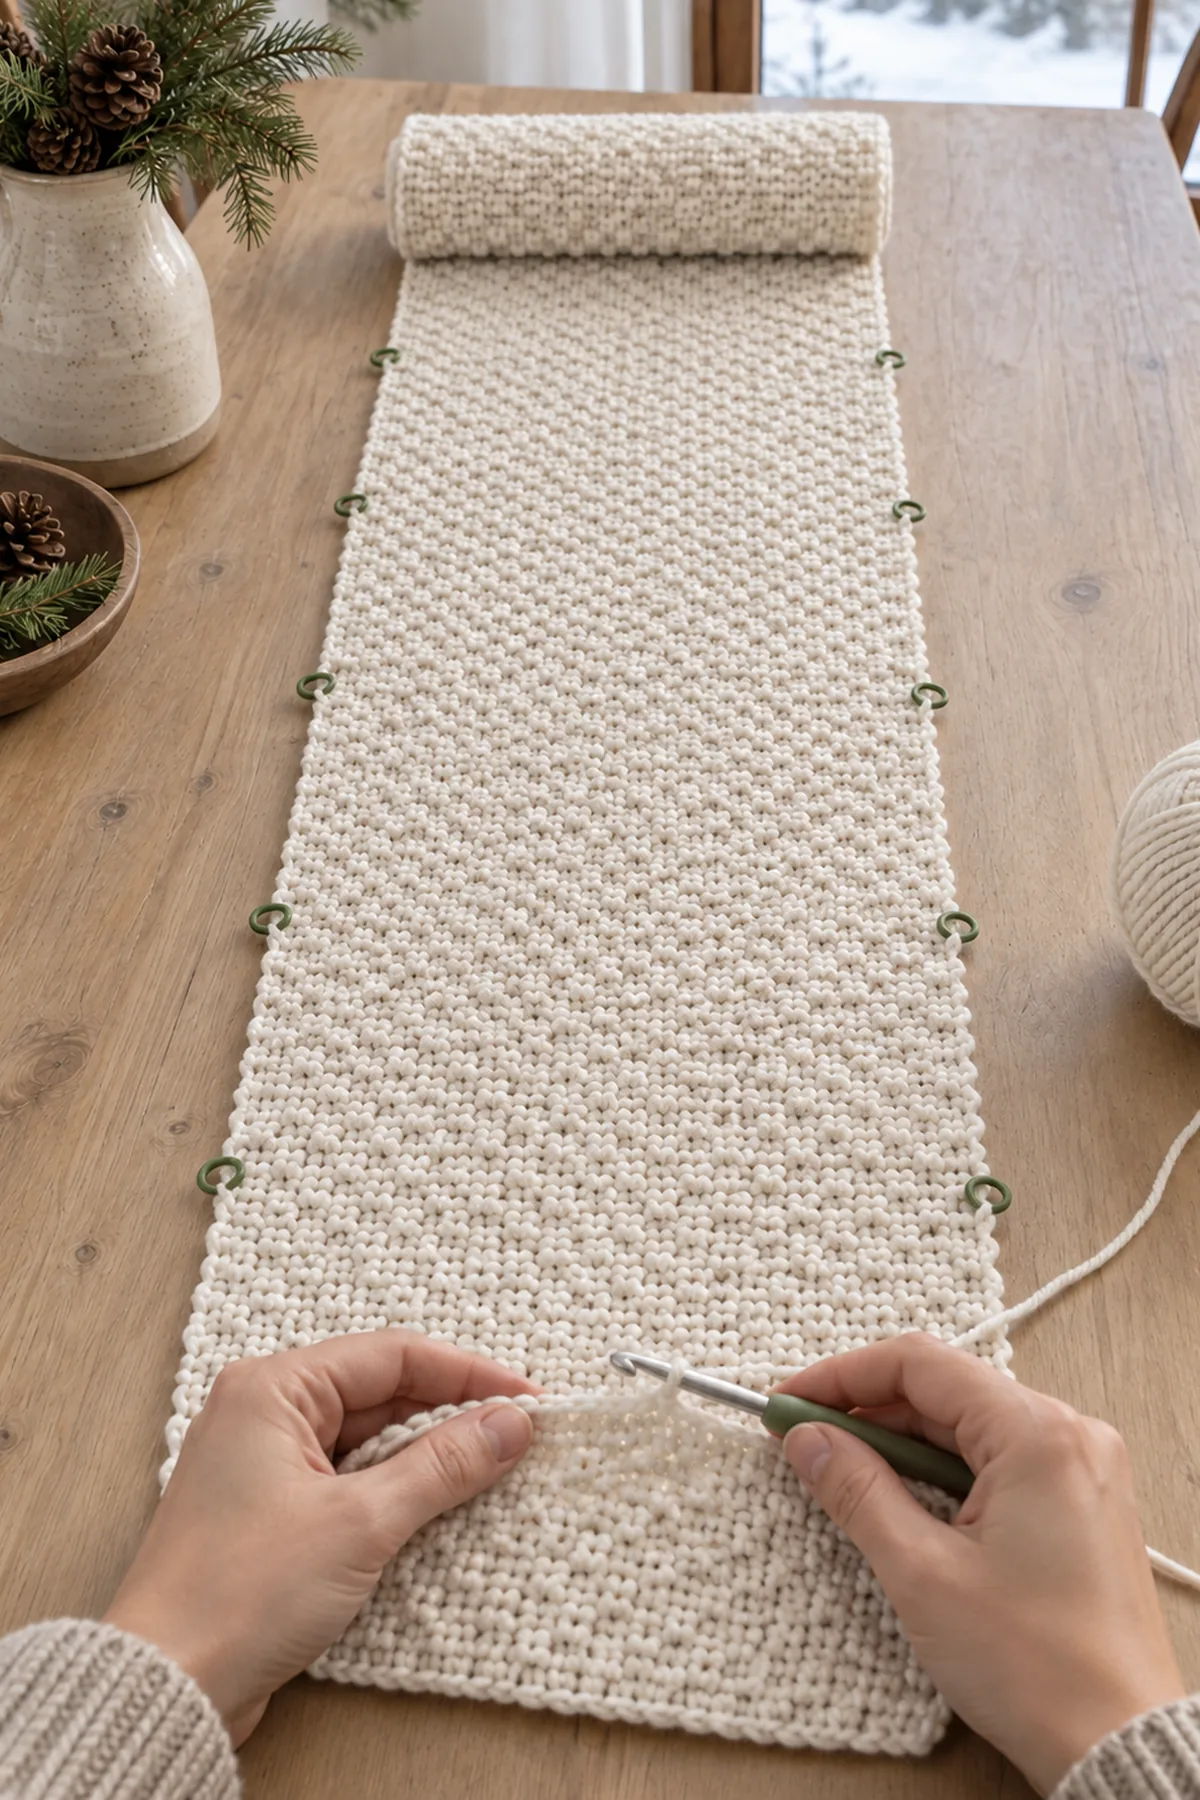
Crochet the Ivory Moss-Stitch Base
Use ivory and place markers every 10 positions.
- Foundation Row: Ch 102. Sc in the second chain, then repeat [ch 1, skip 1 chain, sc in next chain] across. Turn. (51 sts)
- Row 1: Ch 1, sc in first stitch, repeat [ch 1, sc in next chain-1 space] across, and sc in final stitch. Turn. (51 positions)
- Rows 2–156: Repeat Row 1, maintaining 51 positions.
- Fasten off and block to approximately 12.5 by 48.5 inches.
Add the Ribbed Evergreen Border
Join forest green with the right side facing.
- Border Round 1: Sc evenly around, placing 3 sc in every corner.
- Border Round 2: Work BLO sc in every stitch with 3 BLO sc at each corner.
- Border Round 3: Alternate front-loop and back-loop sc around for a subtle ribbed frame. Join invisibly.
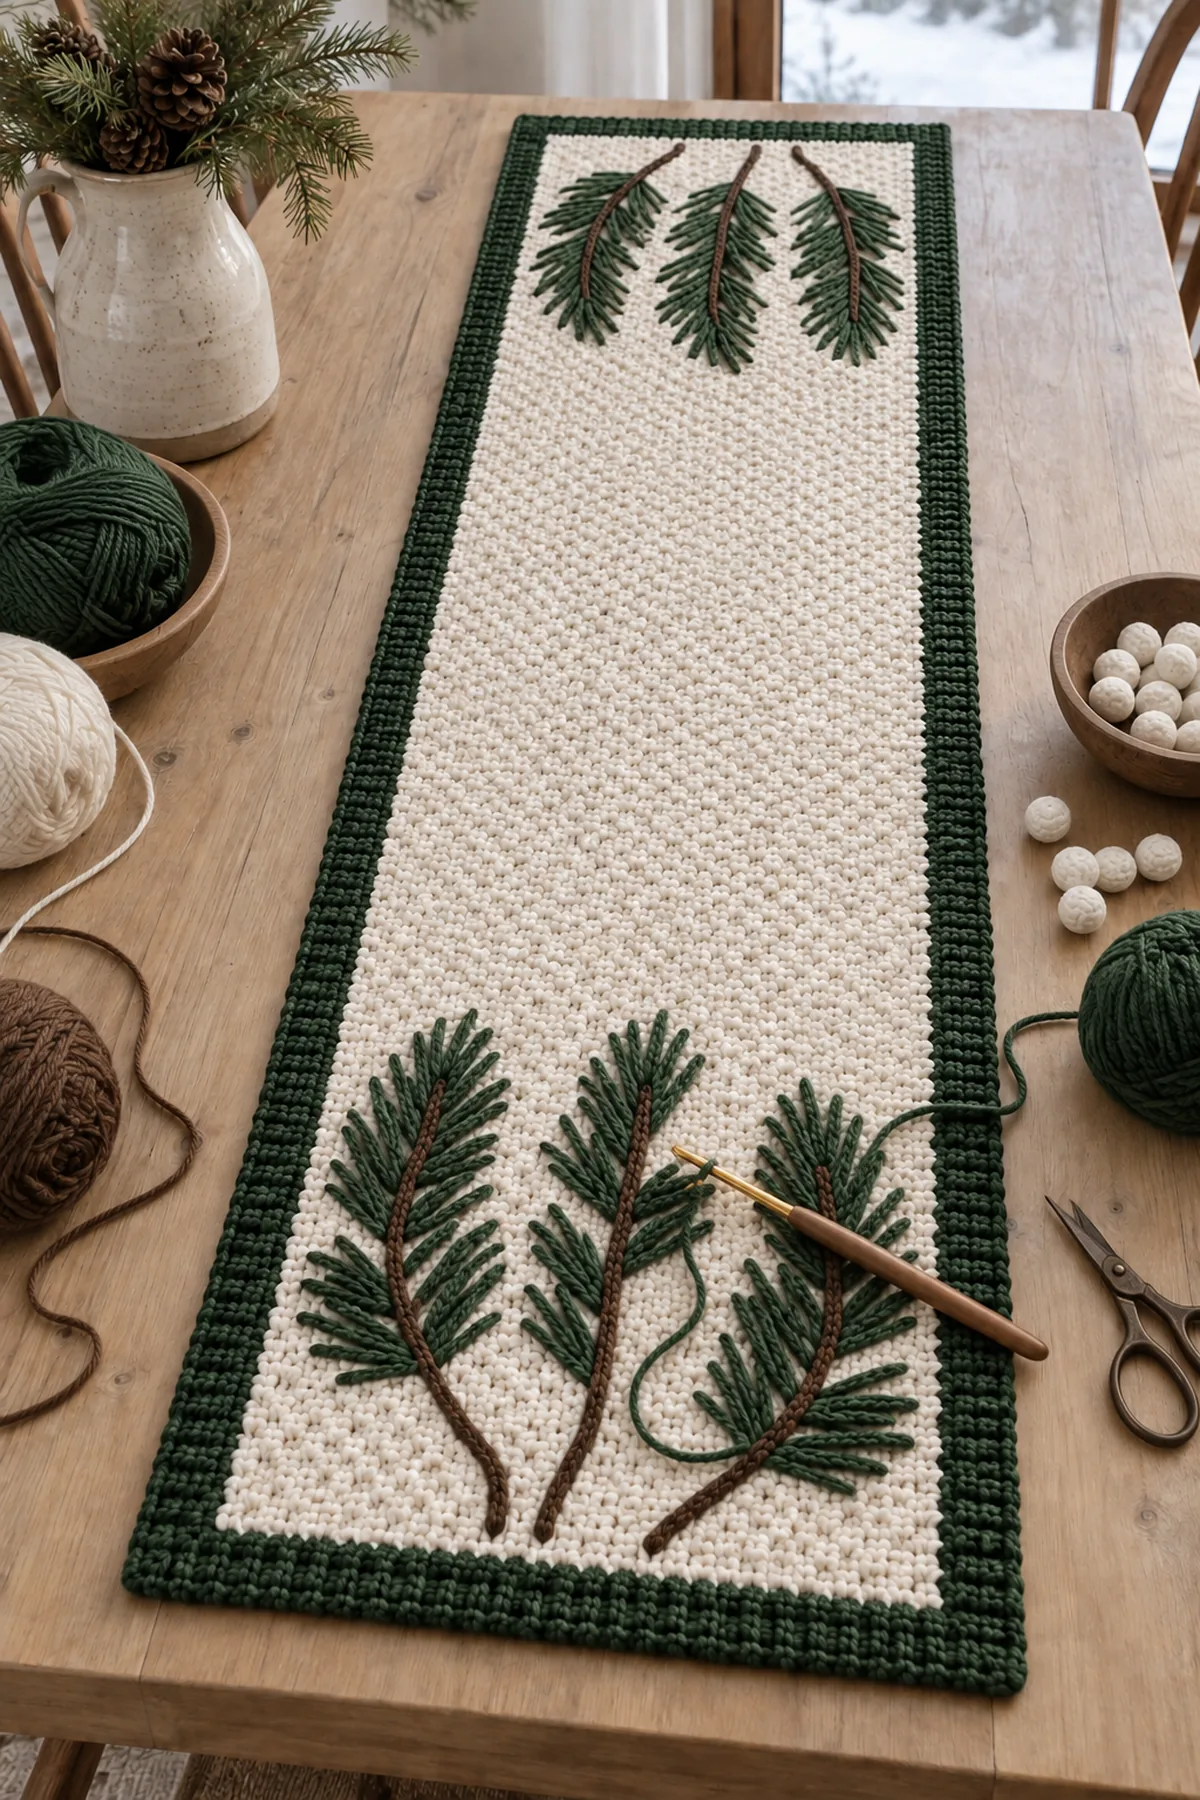
Surface-Crochet Six Pine Branches
Mark three branch zones at each end, leaving the center 16 inches clear.
- With brown, surface-slip-stitch one gently curved 10-inch stem in each marked zone.
- With green, anchor a pine-needle cluster every 1 inch along both sides of each stem.
- Make 12 clusters on each branch, alternating their angle toward the branch tip.
- Secure the final cluster at the tip and weave the green tail beneath the branch.
Add Snow Bobbles and Finish the Layout
Use white and distribute three bobbles on every branch.
- Join white beside a branch stem, work one four-dc bobble, chain 1 to close, and fasten off with a sewing tail.
- Make seventeen more bobbles for a total of eighteen.
- Sew three bobbles to each branch at different distances from the stem.
- Steam lightly from the wrong side and reshape every needle cluster.
Assembly and Shaping
Place three branches at each end with their tips angling toward the clear center. Keep outer needles 1 inch from the border and stagger the white bobbles so they do not form straight rows.
Lay every component on a flat surface before joining. Match the marked centers first, then divide each remaining edge into equal sections. Work through both layers with consistent tension and pause after each section to check that the fabric lies flat. This measured approach prevents twisting and keeps decorative details facing the intended direction.
Finishing
- Weave base ends through moss-stitch spaces.
- Secure surface-stitch stems at both ends.
- Tack only the bases of needle clusters so their tips remain dimensional.
- Block to 14 by 50 inches and lift every snow bobble while damp.
For a polished result, weave each tail through several same-color stitches, reverse direction once, and trim only after the fabric has been gently stretched. Block to the listed dimensions without flattening textured stitches. Inspect joins, borders, straps, and decorative pieces before the project is used or gifted.
Helpful Tips
- Use removable markers to sketch branch curves before adding yarn.
- Work all brown stems before switching to green.
- Count twelve needle clusters per branch.
- Use a smaller needle when sewing bobbles so the white yarn does not distort the base.
Good lighting and a contrasting stitch marker make counting much easier. If a section looks uneven, compare the current count with the previous checkpoint before continuing. Fixing one missed stitch early is faster than compensating later, and it preserves the measurements used by the assembly instructions.
Frequently Asked Questions
Can I omit the snow bobbles?
Yes. The six pine branches remain complete without them, creating a runner suitable for the entire year.
How can I lengthen the runner?
Add moss-stitch rows in pairs before the border and preserve the clear center between the two branch groups.
Why are my pine needles curling?
The chains are too tight. Remake the cluster with relaxed chains and block the tips outward.
Conclusion
The completed pine-branch runner pairs a calm moss-stitch background with surface-drawn evergreen stems, loose needle clusters, and snowy bobbles. Its botanical construction and restrained winter colors make it distinct from motif-grid and floral-appliqué runners.
Printable Crochet Pattern Card
Project: Crochet Winter Pine Branch Table Runner
Skill level: Intermediate Hook: 4.5 mm Yarn: Worsted
Finished size: Approximately 14 inches wide by 50 inches long
Card Materials
- Approximately 760 yards winter ivory worsted-weight cotton yarn
- Approximately 210 yards forest-green cotton yarn
- Approximately 45 yards dark brown cotton yarn
- Approximately 35 yards bright white cotton yarn
- 4.5 mm crochet hook
- Twelve locking stitch markers
- Yarn needle
- Scissors
- Tape measure
Card Instructions
- Crochet the Ivory Moss-Stitch Base: Work a 51-position ivory moss-stitch base for 156 rows.
- Add the Ribbed Evergreen Border: Finish the base with three structured green rounds and a ribbed outer edge.
- Surface-Crochet Six Pine Branches: Work six curved brown stems and add twelve green needle clusters to each branch.
- Add Snow Bobbles and Finish the Layout: Add eighteen white snow bobbles, three to each evergreen branch.
Finish: Check every count, weave in all ends, block to measurement, and inspect each join.