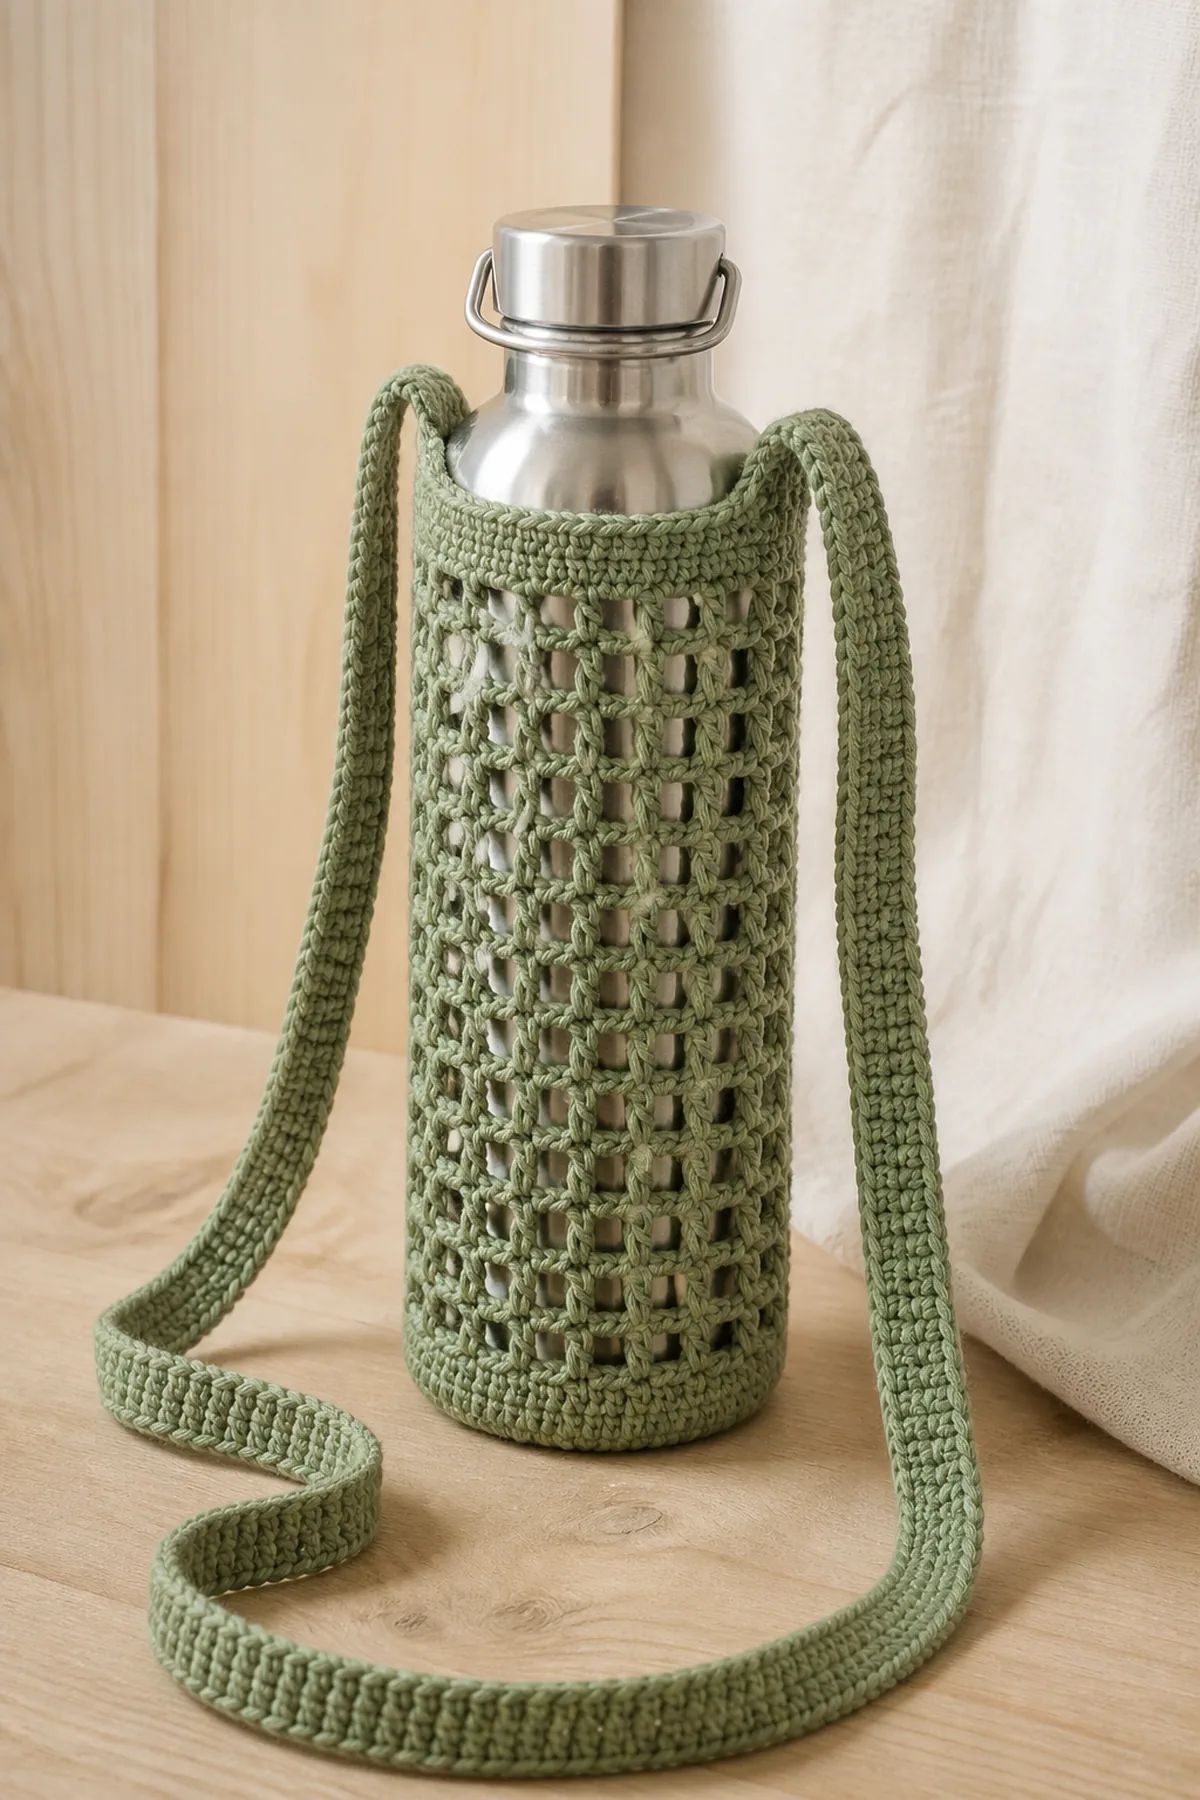
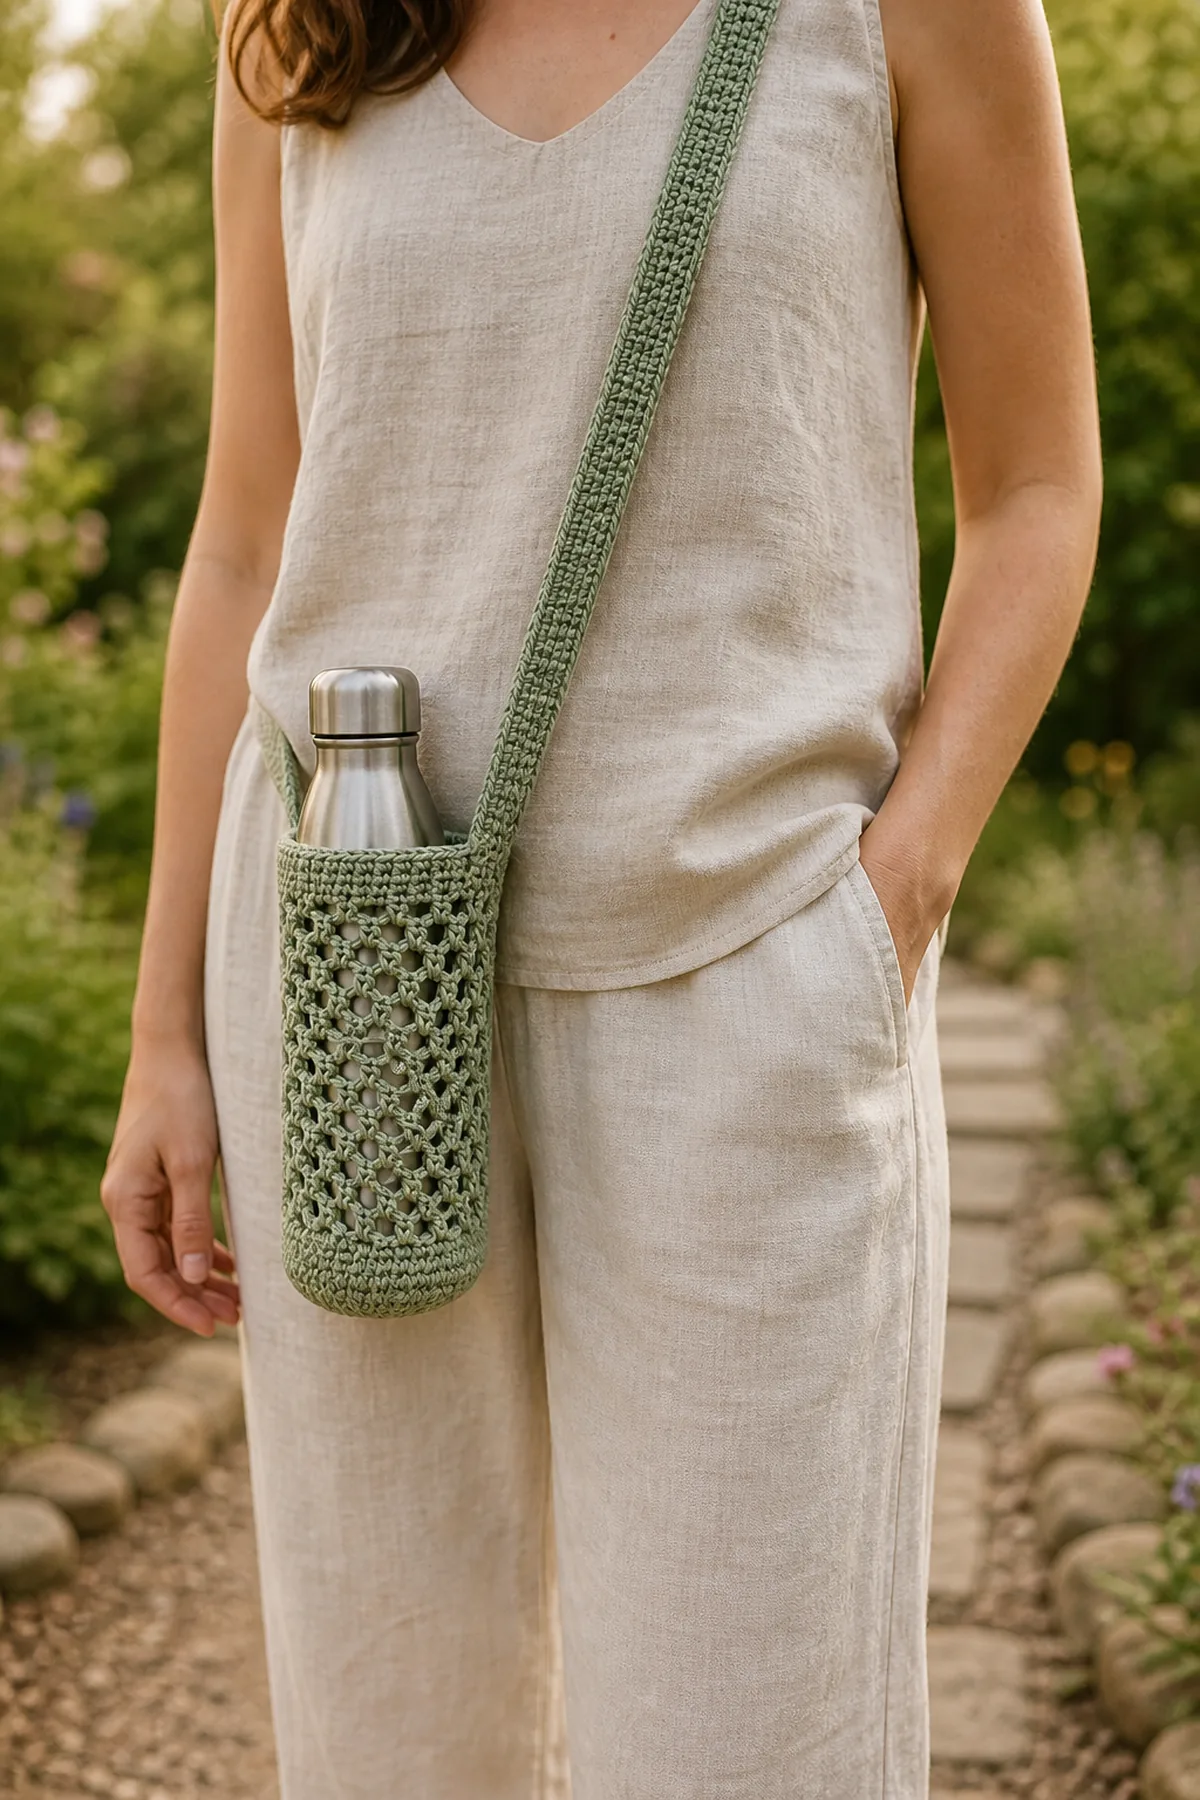
This easy crochet ribbed water bottle holder keeps a reusable bottle close while leaving your hands free. A firm cotton base supports the bottle, a flexible mesh body accommodates common sizes, and a reinforced strap distributes the weight.
The holder begins with a joined chain sized to the bottle base, continues upward in repeating mesh sections, and finishes with a dense top round. The strap is worked separately in ribbed rows and attached through marked points on the rim.
Pattern Details
- Hook Size: 4 mm
- Finished Size: Approximately 4 inches wide, 8 inches tall, with a 42-inch adjustable strap
- Gauge: 15 single crochet stitches and 16 rows = 4 inches
- Terminology: US
- Estimated Time: 3–4 hours
- Construction: A joined-chain tube forms the bottle sleeve; a ribbed strap is crocheted separately and attached at two reinforced rim points.
- Skill level: Easy
Why You’ll Love This Project
The repeating mesh is quick to memorize and easy to count. Cotton yarn handles everyday use well, the open fabric dries quickly, and the strap length can be checked before attachment for a customized shoulder or crossbody fit.
Materials
- Approximately 180 yards worsted-weight cotton yarn
- 4 mm crochet hook
- Two locking stitch markers
- Tape measure
- Yarn needle
- Scissors
- A clean reusable bottle for fit checks
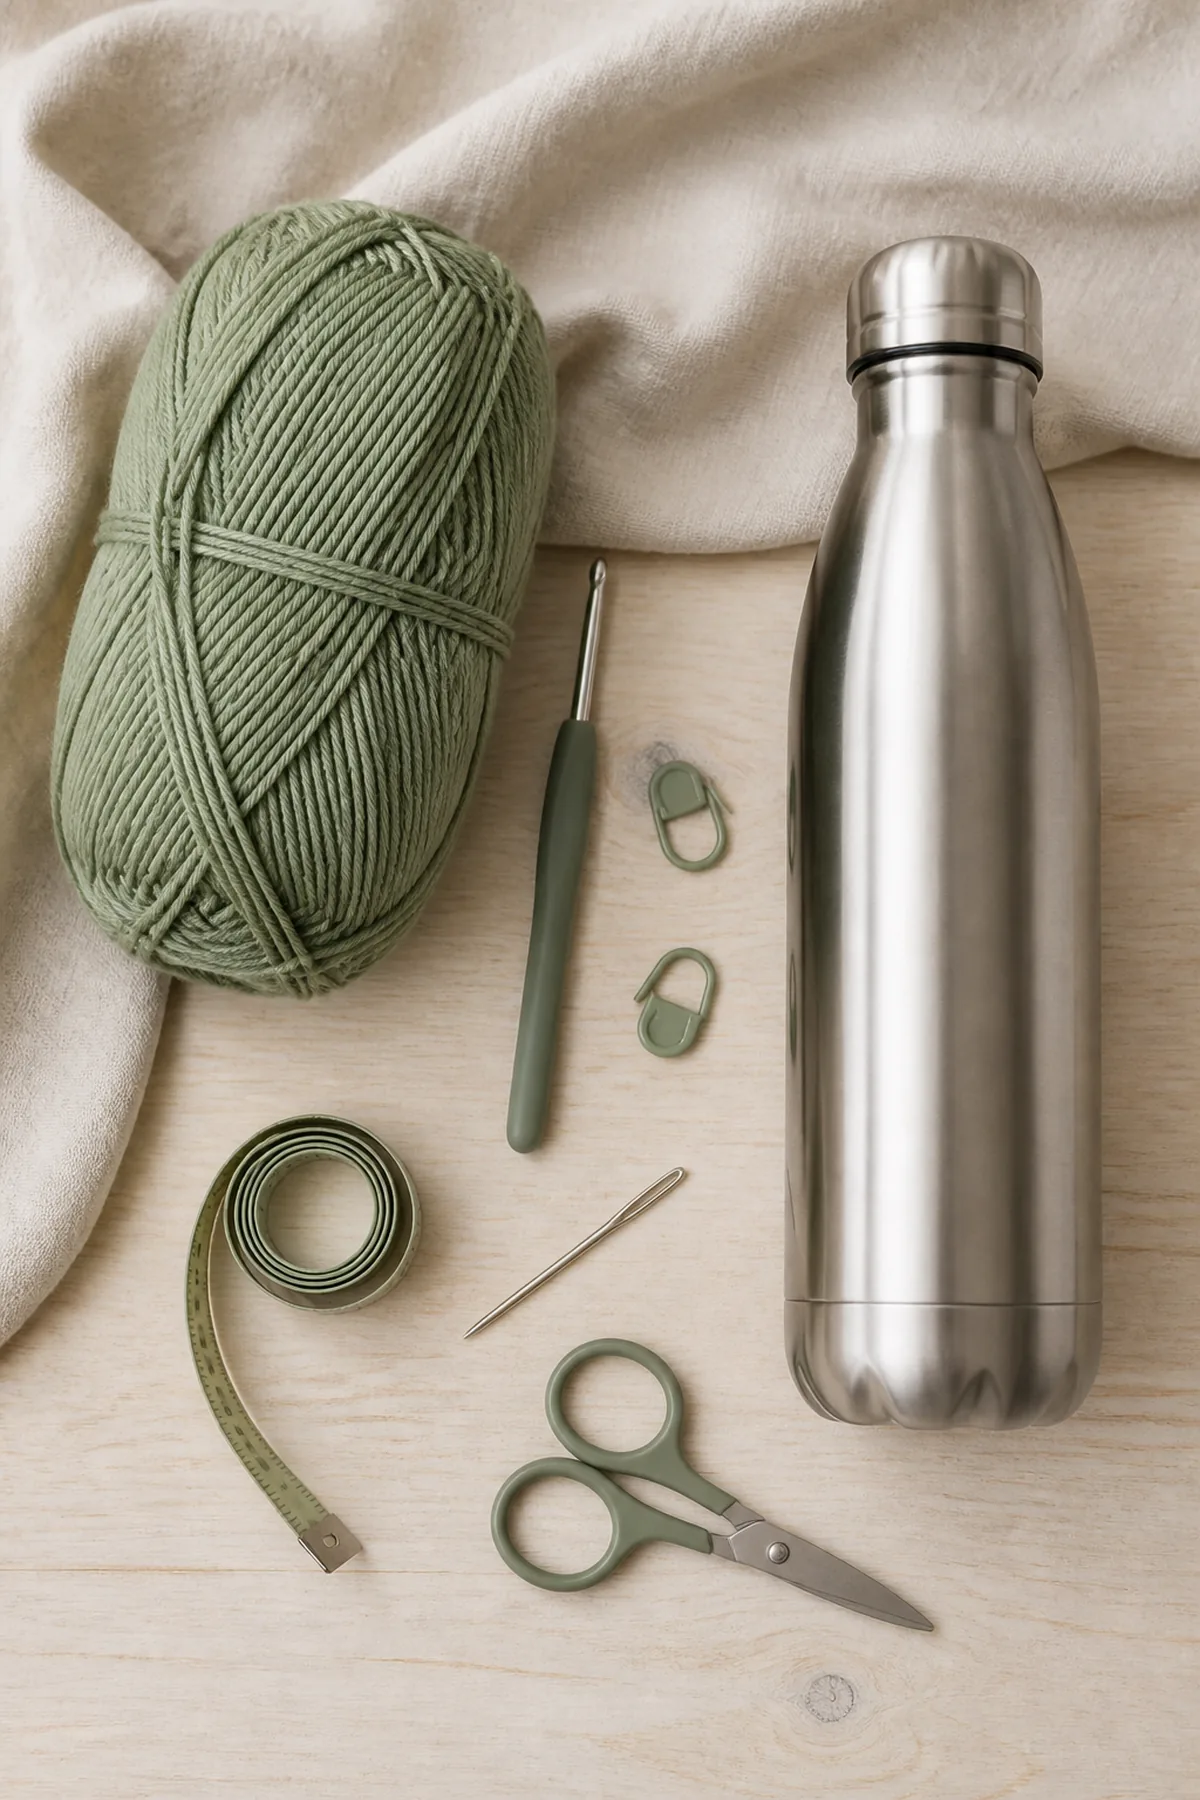
Gauge, Measurements, and Planning
The joined 30-chain foundation should slide over the bottle base without sagging. Add or remove chains in pairs for another bottle size because each mesh repeat uses two positions.
Make and wash a gauge swatch before beginning. Measure only after the swatch is completely dry. If the stitch width differs, change hook size rather than pulling the working yarn tighter. Keep a written count at the end of every section so the finished edges remain balanced and the assembly points line up.
Abbreviations and Special Stitches
- ch: chain
- dc: double crochet
- sc: single crochet
- sl st: slip stitch
- st(s): stitch(es)
- rnd: round
- BLO: back loop only
Special stitch guidance: For ribbed single crochet, insert the hook through the back loop only. In mesh rounds, each chain-one space replaces one skipped stitch and still counts as one position.
Important Notes
- Measure the bottle around its widest point before joining the foundation chain.
- Keep the joined foundation flat and confirm it is not twisted.
- Beginning chains do not count as stitches.
- Reinforce both strap attachment points by sewing through at least four rim stitches.
Complete Instructions for Easy Crochet Ribbed Water Bottle Holder
Crochet the Bottle Sleeve
Use a marker at the join and keep the foundation edge flat.
- Foundation: Ch 30, check that the chain fits around the bottle, and join to the first chain without twisting. The joined chain provides 30 working positions. (30 sts)
- Base Rnd 1: Ch 1, sc in each joined chain, and join to the first sc. Do not turn. (30 sts)
- Mesh Rnds 2–18: Ch 2, then repeat [dc in next stitch, ch 1, skip next stitch] fifteen times. Join to the first dc and do not turn. (30 sts)
- Top Rnd 19: Ch 1, sc in each dc and each chain space around. Join to the first sc. (30 sts)
- Work one additional slip-stitch round through all 30 top stitches, then fasten off.
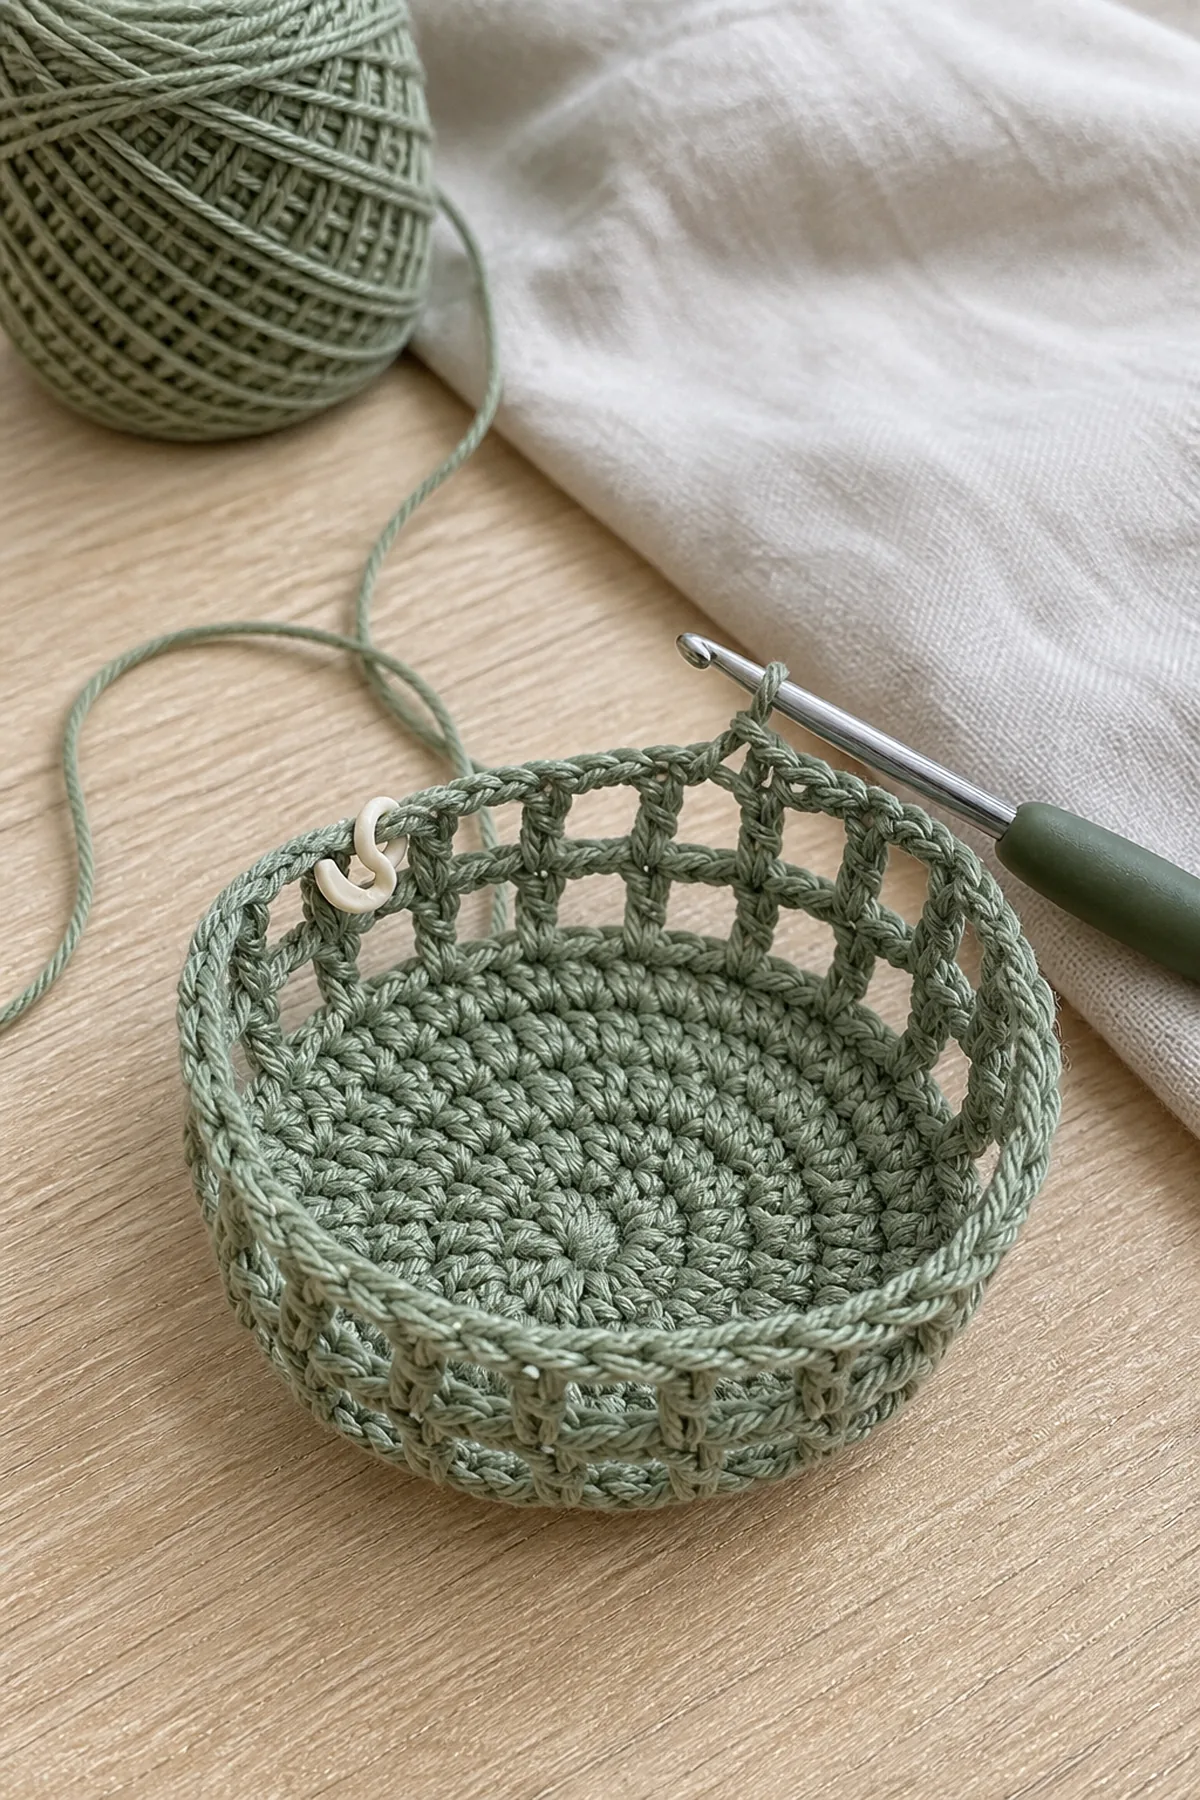
Crochet the Ribbed Strap
The strap is worked in short turned rows so it remains firm under the bottle’s weight.
- Ch 7. Sc in the second chain from the hook and in each chain across. Turn. (6 sts)
- Row 2: Ch 1, sc in the BLO of all 6 stitches. Turn. (6 sts)
- Repeat Row 2 until the strap measures 42 inches or the preferred length.
- Fasten off with a 20-inch sewing tail at each end.
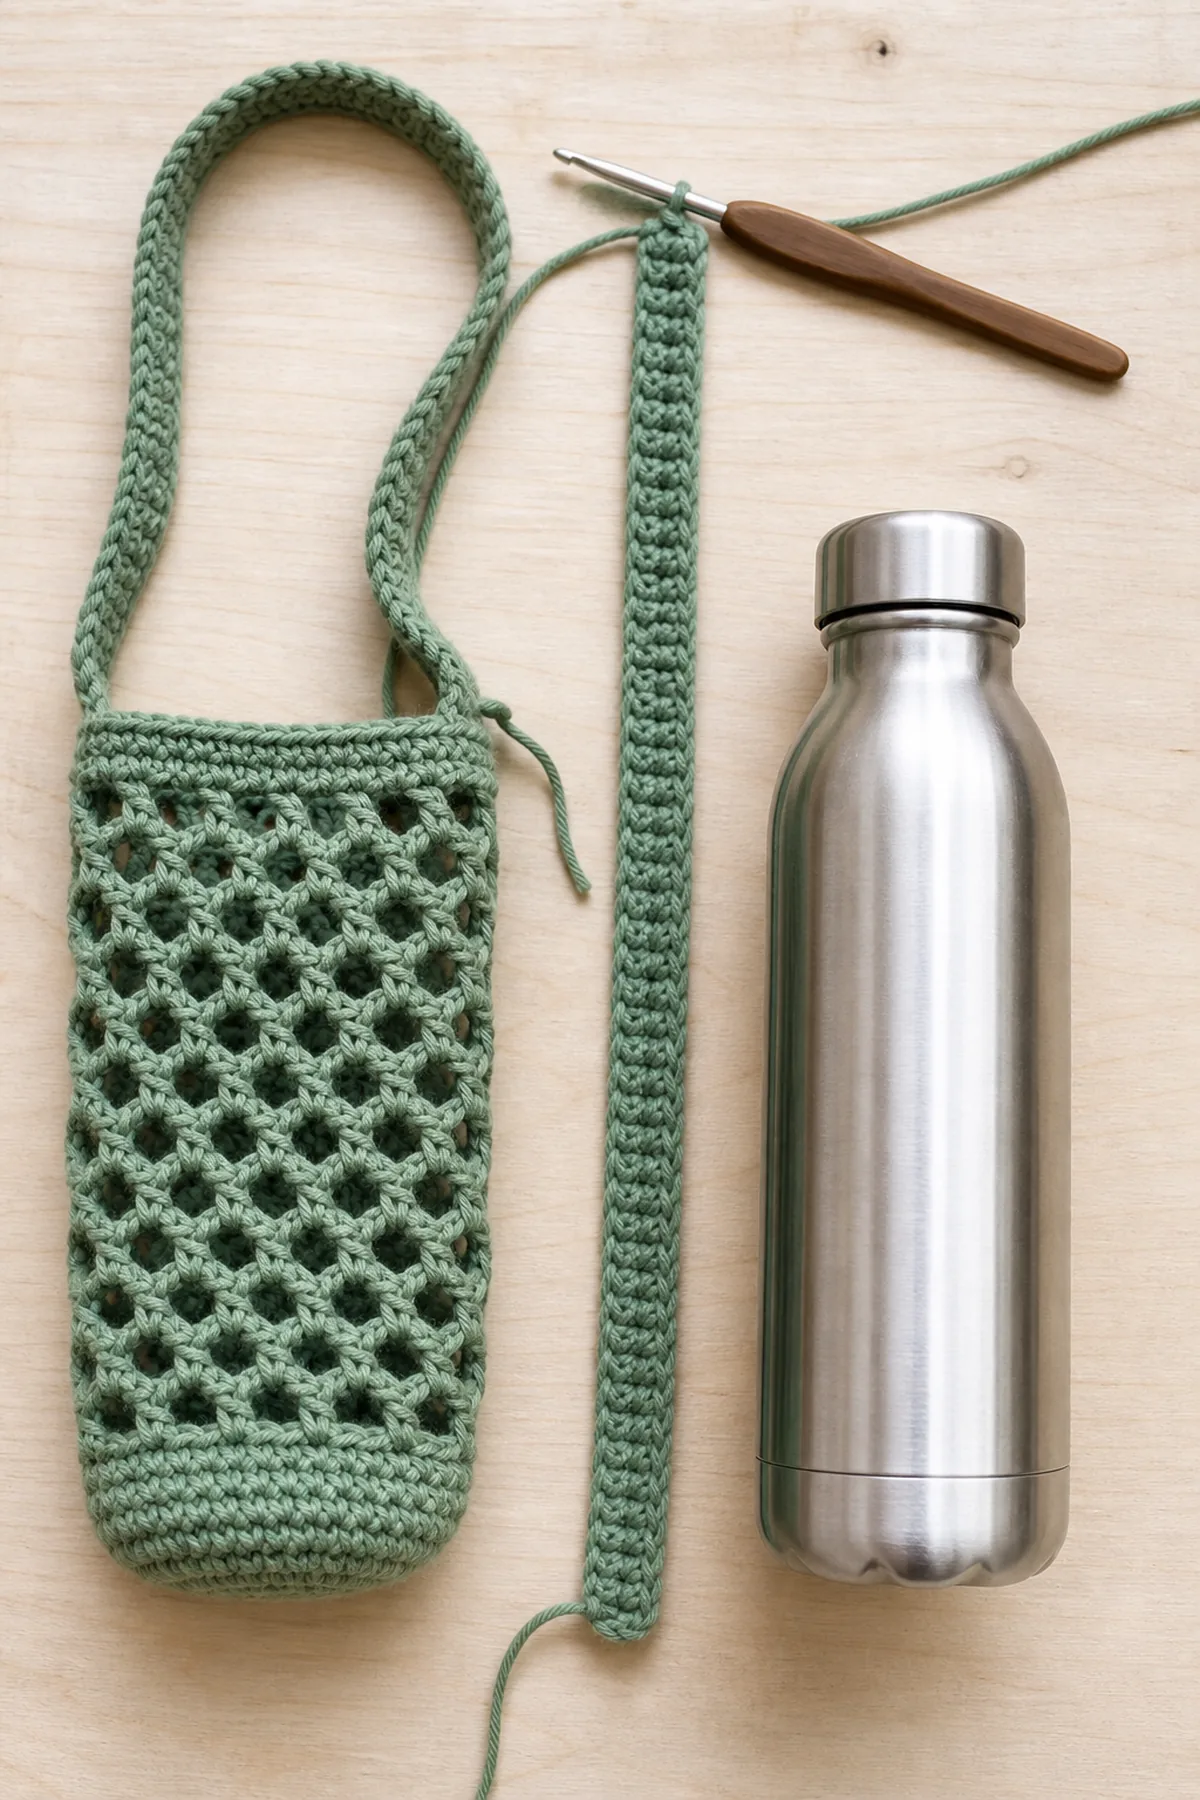
Attach and Reinforce the Strap
Mark two rim points directly opposite one another before sewing.
- Thread one strap tail through the yarn needle and overlap the strap end by 1 inch inside the rim.
- Sew through four neighboring rim stitches and the strap layers in a square, then cross the square diagonally.
- Repeat at the opposite marker, checking that the strap is not twisted.
- Place the bottle inside and lift the holder over a padded surface to test both joins.
Assembly and Shaping
Center the strap attachments on opposite sides of the opening and align the rib columns before sewing. The bottle should hang upright when the strap is lifted from its midpoint.
Lay every component on a flat surface before joining. Match the marked centers first, then divide each remaining edge into equal sections. Work through both layers with consistent tension and pause after each section to check that the fabric lies flat. This measured approach prevents twisting and keeps decorative details facing the intended direction.
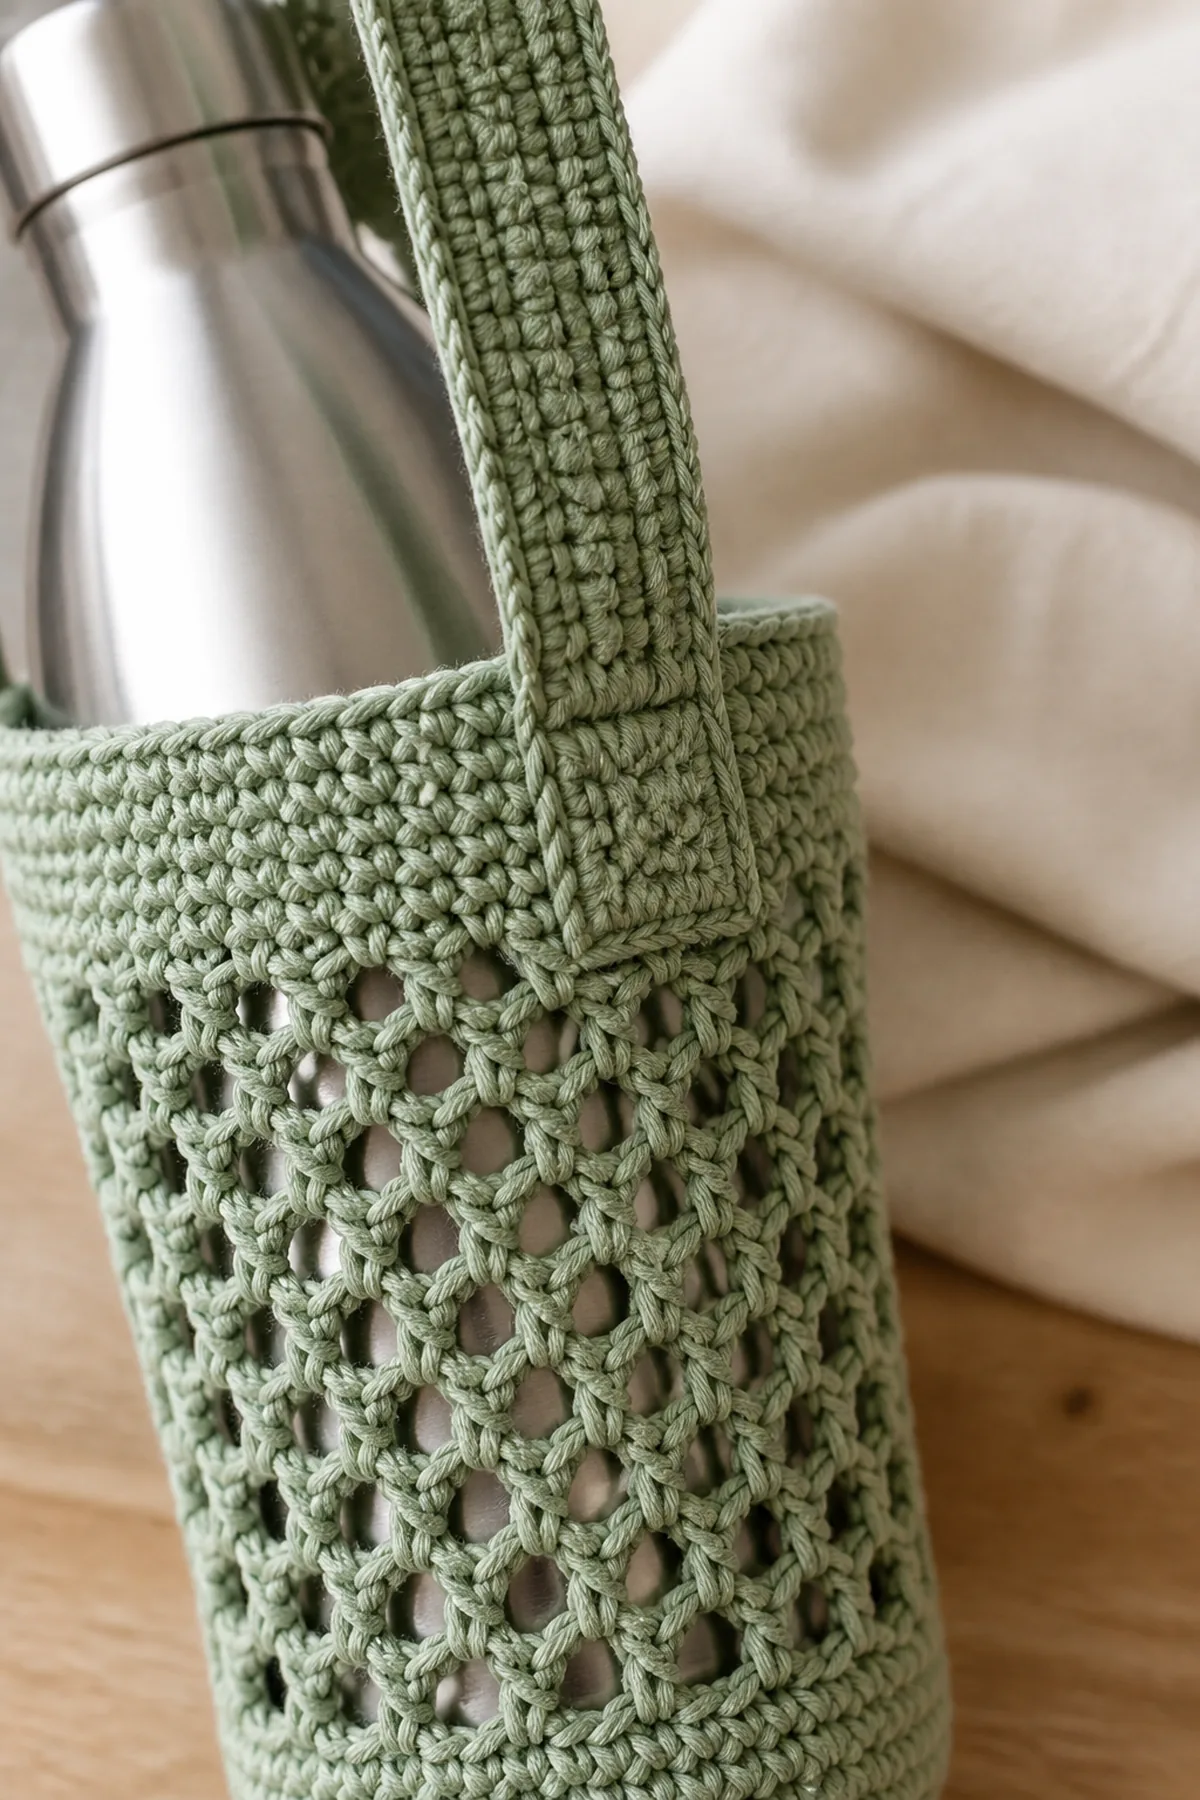
Finishing
- Weave the foundation and rim tails through dense single crochet stitches.
- Secure the strap sewing tails inside the reinforced boxes.
- Hand-wash the empty holder, reshape it around a clean bottle, and dry flat.
- Inspect the strap and rim before every use, especially when carrying a full bottle.
For a polished result, weave each tail through several same-color stitches, reverse direction once, and trim only after the fabric has been gently stretched. Block to the listed dimensions without flattening textured stitches. Inspect joins, borders, straps, and decorative pieces before the project is used or gifted.
Helpful Tips
- Choose mercerized or tightly spun cotton to reduce stretching.
- Add or remove foundation chains in multiples of two.
- Try the strap length with the bottle inside before final sewing.
- Keep mesh chains relaxed so the sleeve expands evenly.
Good lighting and a contrasting stitch marker make counting much easier. If a section looks uneven, compare the current count with the previous checkpoint before continuing. Fixing one missed stitch early is faster than compensating later, and it preserves the measurements used by the assembly instructions.
Frequently Asked Questions
How do I fit a wider bottle?
Add foundation chains in pairs until the joined chain fits, then add one mesh repeat for every two new positions.
Can I shorten the strap?
Yes. Stop the ribbed rows at the preferred measurement, allowing two extra inches for the attachment overlaps.
Can I use acrylic yarn?
Acrylic works, but cotton usually stretches less, absorbs condensation, and gives the strap more stability.
Conclusion
The completed water bottle holder combines a breathable sleeve with a strong ribbed strap and reinforced joins. Once the fit is checked, it becomes a useful everyday crochet accessory for walks, errands, and travel.
Printable Crochet Pattern Card
Project: Easy Crochet Ribbed Water Bottle Holder
Skill level: Easy Hook: 4 mm Yarn: Worsted
Finished size: Approximately 4 inches wide, 8 inches tall, with a 42-inch adjustable strap
Card Materials
- Approximately 180 yards worsted-weight cotton yarn
- 4 mm crochet hook
- Two locking stitch markers
- Tape measure
- Yarn needle
- Scissors
- A clean reusable bottle for fit checks
Card Instructions
- Crochet the Bottle Sleeve: Join 30 chains, work one solid base round, repeat the 30-position mesh through Round 18, and finish with a dense rim.
- Crochet the Ribbed Strap: Work a six-stitch back-loop ribbed strap to the preferred measured length.
- Attach and Reinforce the Strap: Attach the strap at opposite rim markers with boxed and crossed reinforcement stitches.
Finish: Check every count, weave in all ends, block to measurement, and inspect each join.