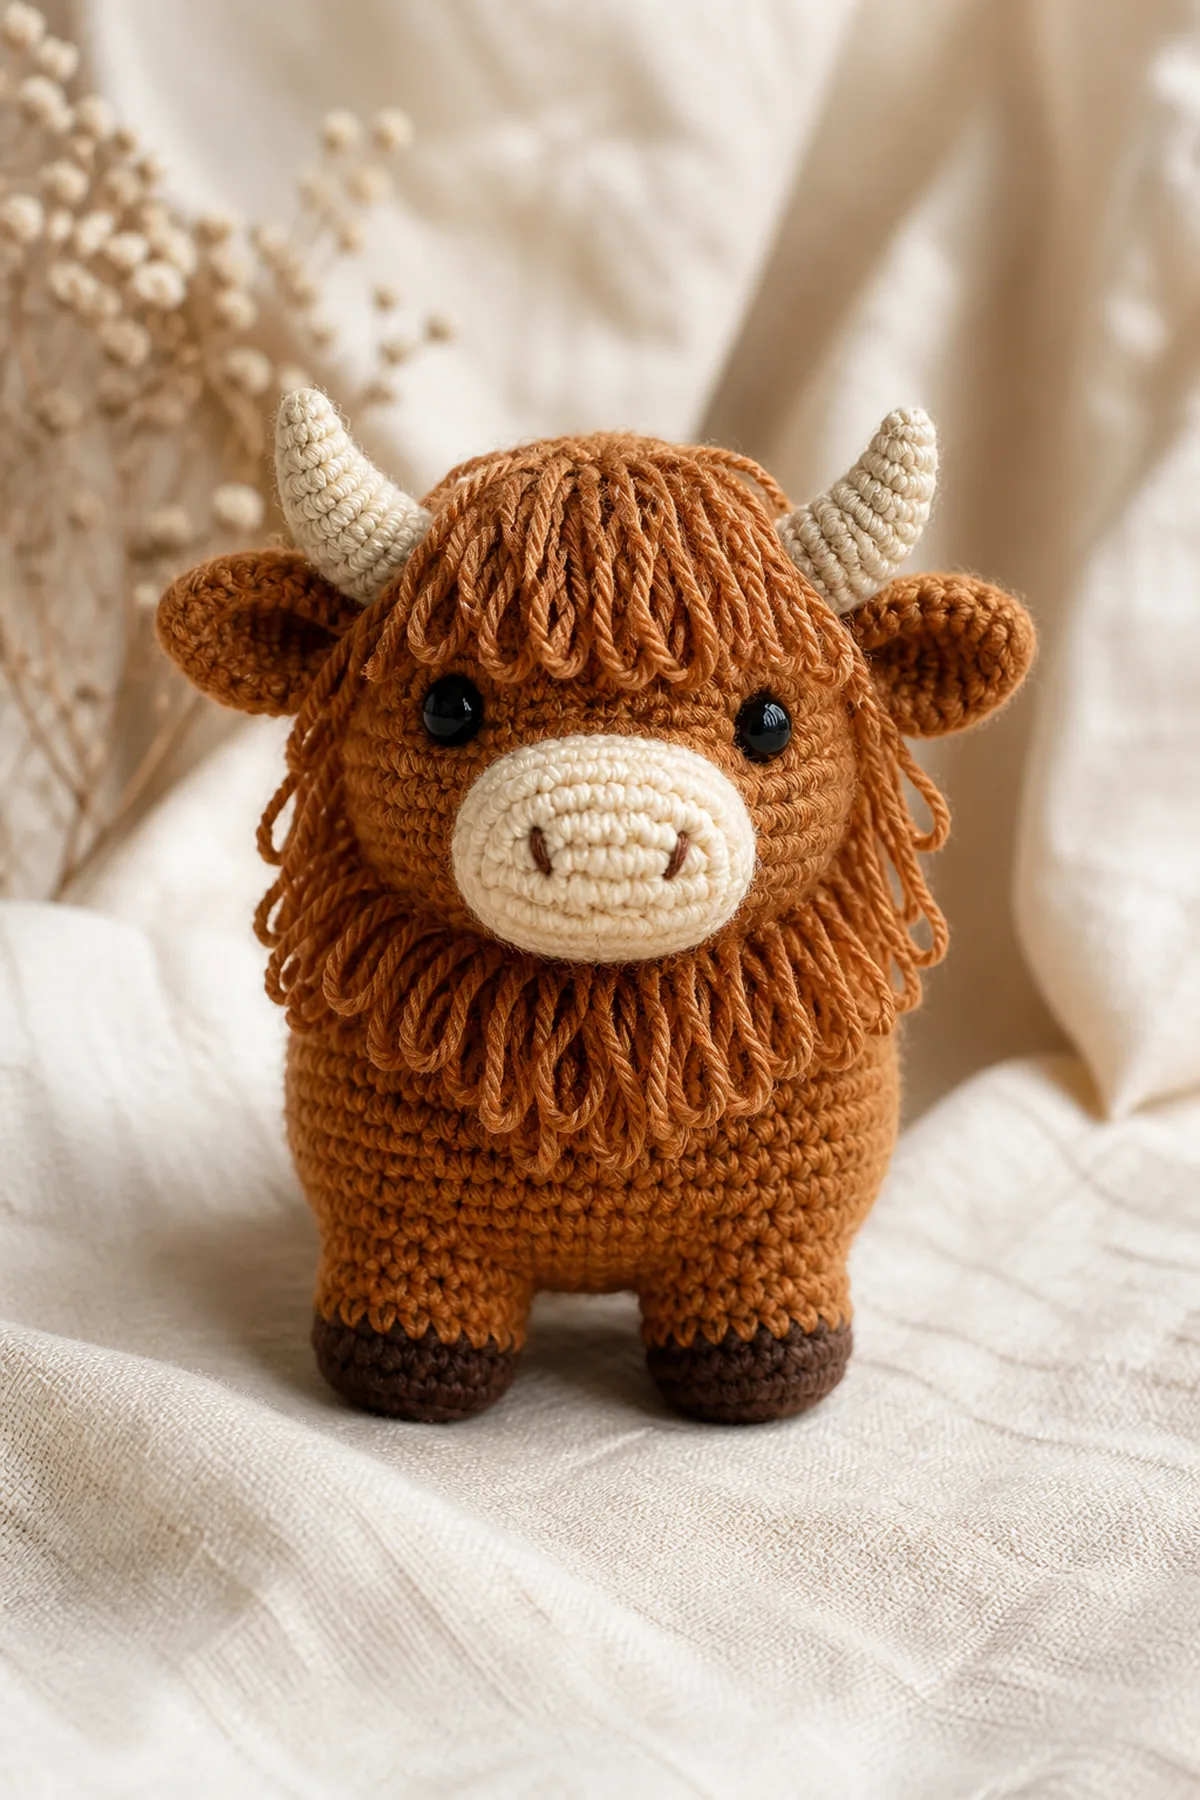
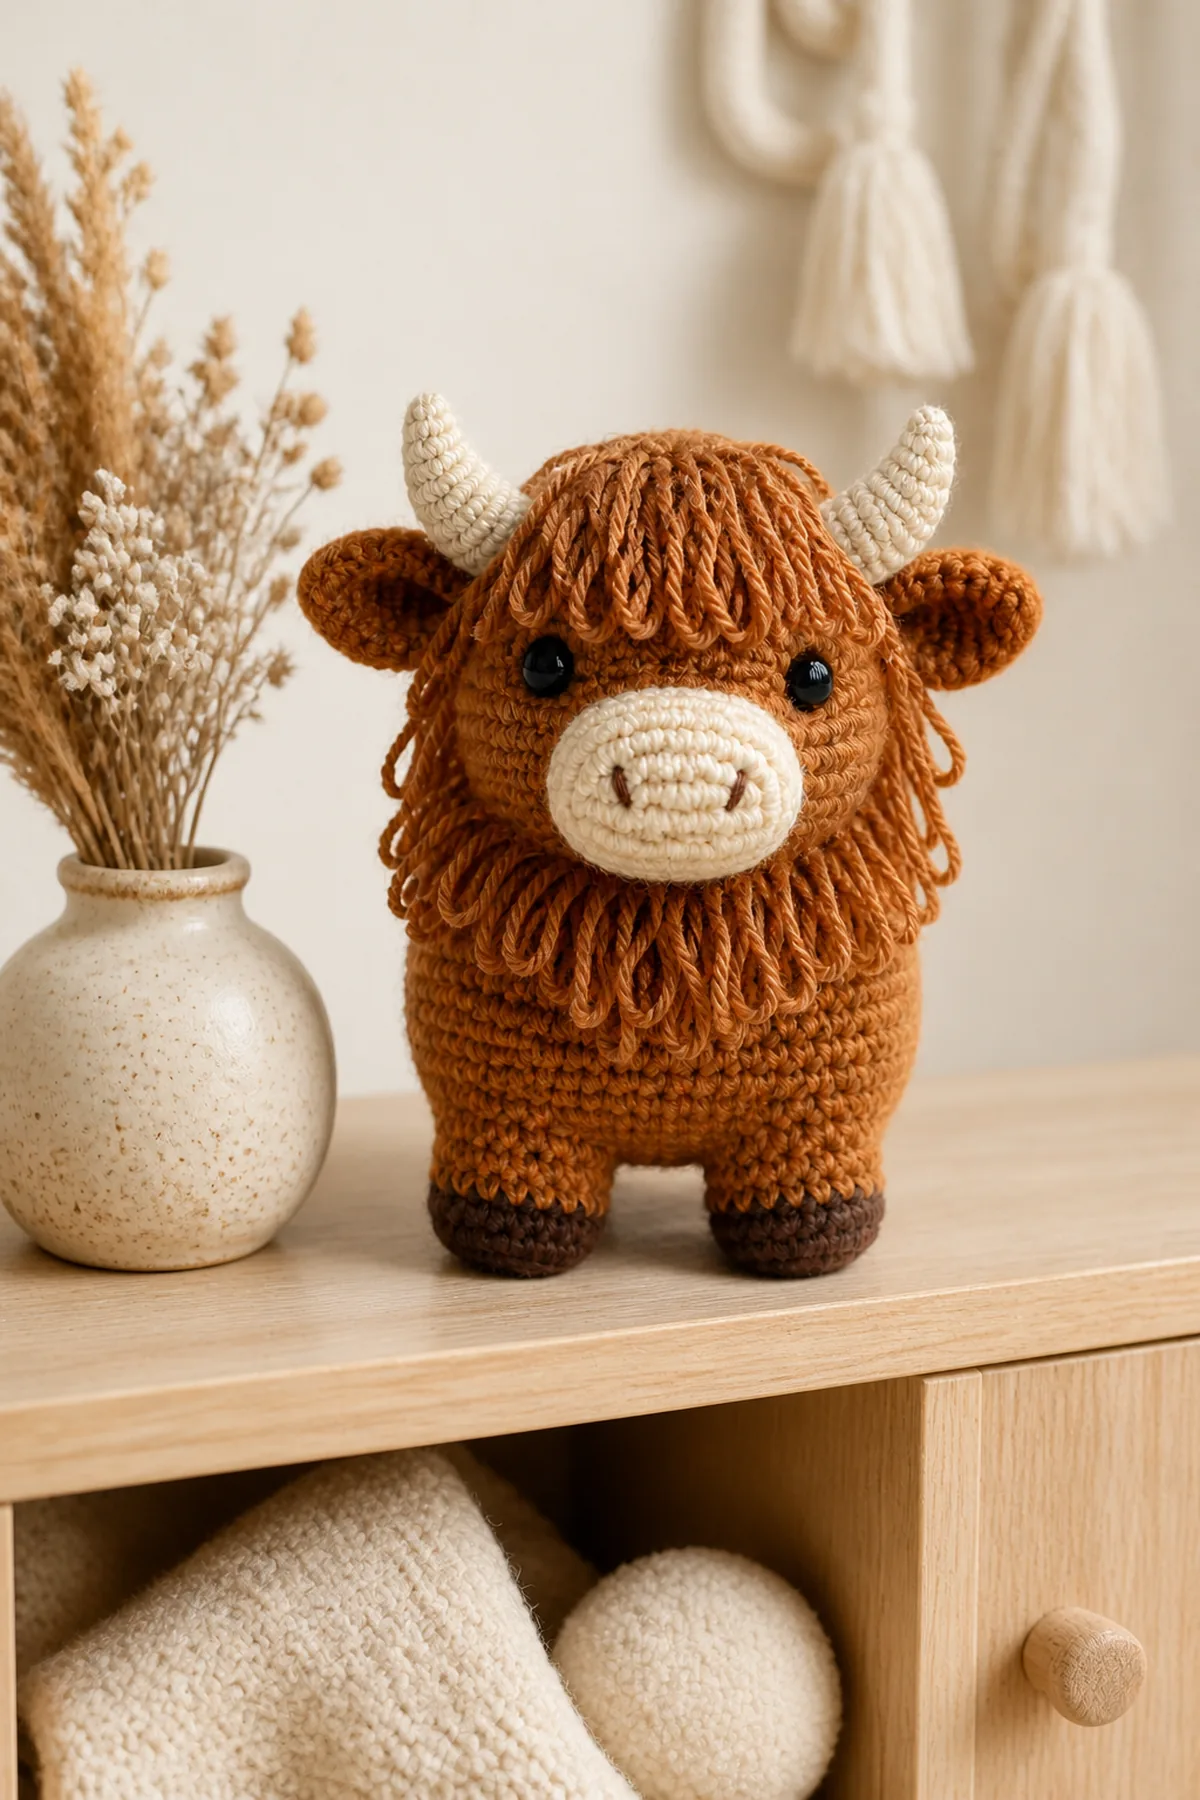
This crochet Highland cow amigurumi combines a friendly farm-animal shape with the wonderfully shaggy coat that makes Highland cattle so recognizable. The caramel body and head grow as one continuous piece, while four sturdy legs, a cream muzzle, oatmeal horns, and curved ears add definition. A final layer of surface-crocheted loop stitches creates the long fringe without hiding the carefully shaped face.
Worked with worsted yarn and a 3.5 mm hook, the finished cow stands approximately 9 inches (23 cm) tall. The pattern uses exact six-section increases and decreases, so the body stays balanced from its flat base through the neck and rounded head. Take time with the pinned assembly and your cow will stand evenly on all four dark hooves.
Why You’ll Love This Highland Cow
The continuous body-and-head construction reduces bulky seams and gives the stuffing a smooth path from base to crown. Separate legs are easier to position precisely than limbs made during a crowded body round. The loop-stitch coat is added last, allowing you to place the eyes, muzzle, horns, and ears while every attachment point remains visible.
This project is best for a confident crocheter who understands continuous rounds, invisible decreases, and simple sewing. The special loop stitch becomes rhythmic after a short practice swatch. Use the classic caramel palette shown here or create a black, cream, or rusty-red cow while keeping every piece in the stated yarn weight.
Pattern Details
- Skill level: Intermediate
- Terminology: US crochet terms
- Finished size: Approximately 9 in (23 cm) tall
- Hook: 3.5 mm (E-4)
- Gauge: Dense enough to contain stuffing
- Estimated time: 6–8 hours
- Construction: Continuous body and head with attached features and surface fringe
Materials
- 250 yd (229 m) caramel worsted yarn
- 45 yd (41 m) dark-brown worsted yarn
- 40 yd (37 m) cream worsted yarn
- 25 yd (23 m) oatmeal worsted yarn
- 3.5 mm hook
- Two 10 mm safety eyes with washers
- Polyester fiberfill
- Black thread, markers, yarn needle, pins, and scissors
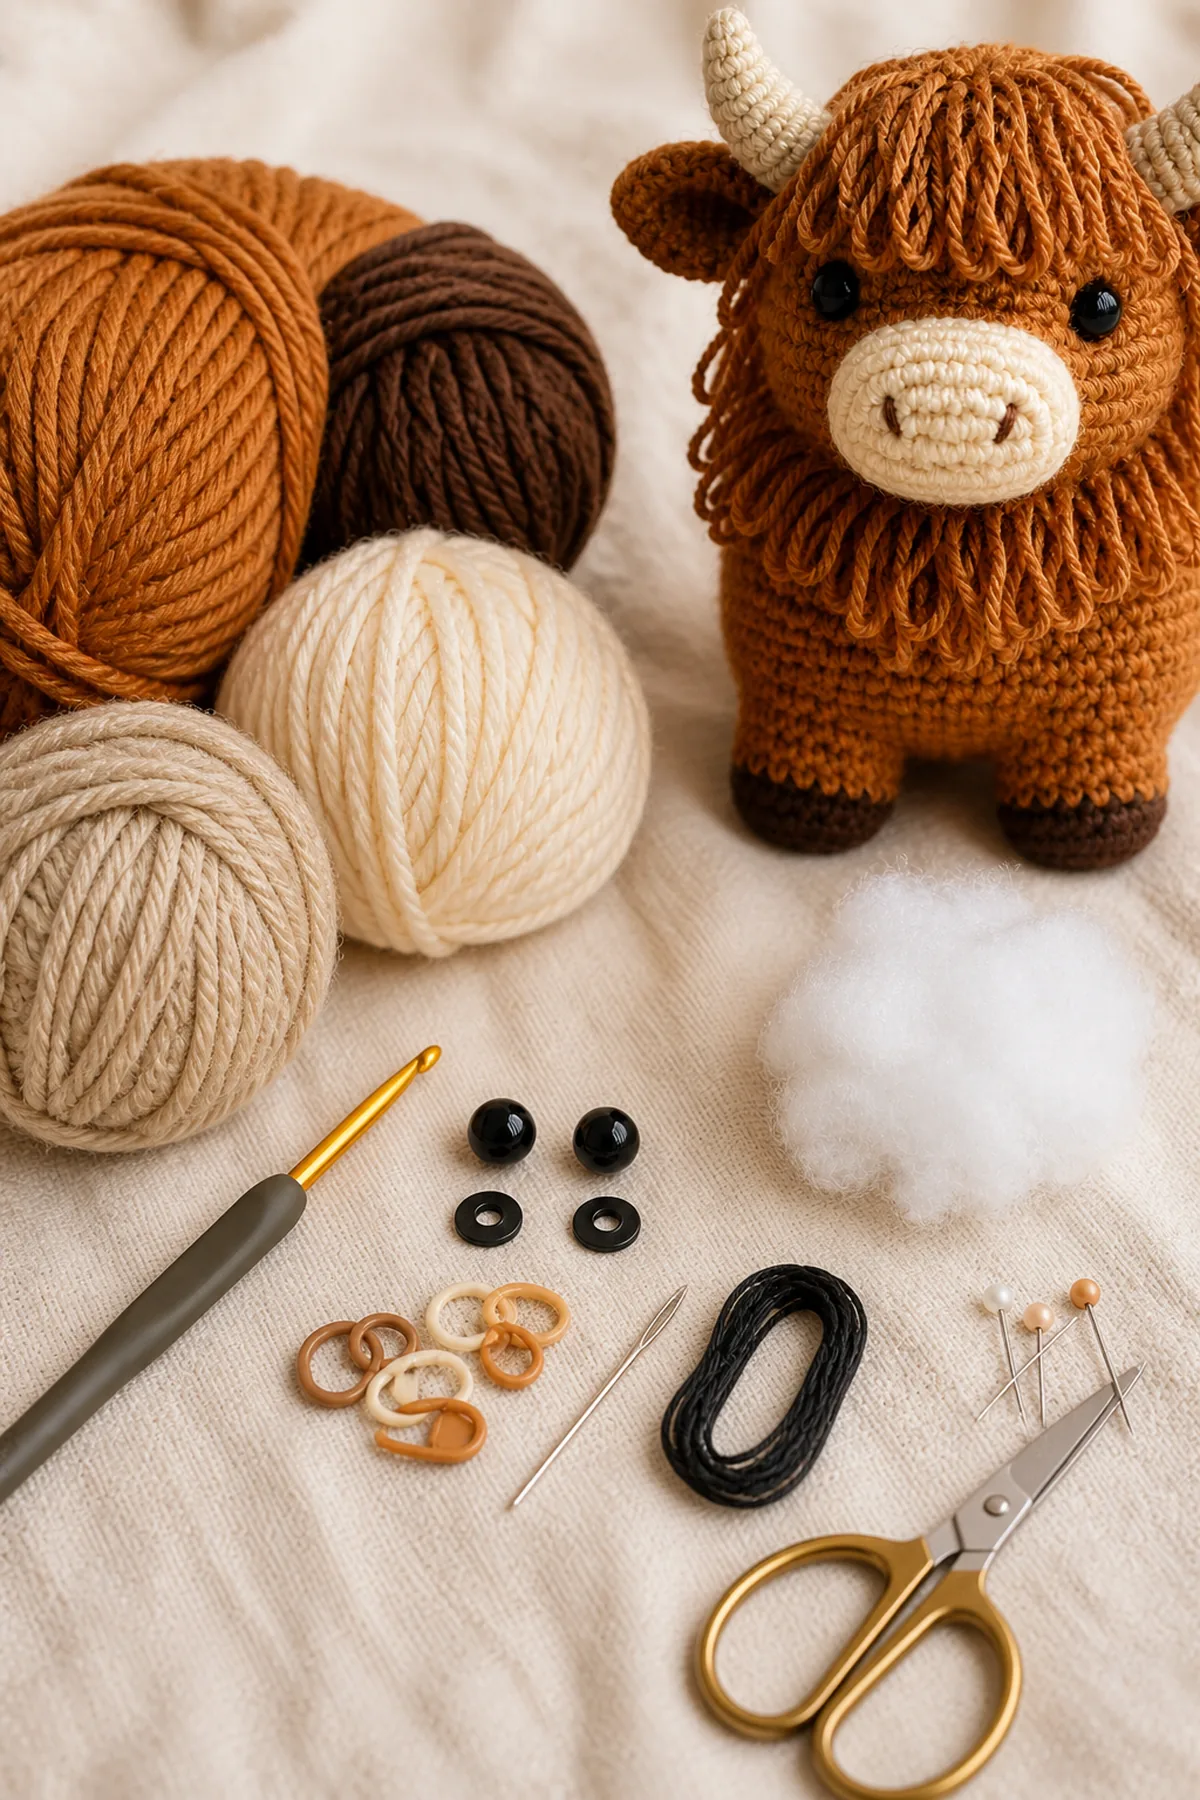
Smooth yarn makes the body rounds and loop anchors easy to see. Select four yarns with similar thickness and twist. If the cow is intended for a child under three, omit the plastic eyes and embroider secure eyes after the head is stuffed.
Abbreviations and Special Stitches
- ch: chain
- dec: invisible decrease
- inc: two single crochets in one stitch
- lp st: loop stitch
- rnd: round
- sc: single crochet
- sl st: slip stitch
Loop stitch: Insert the hook in the indicated stitch. Wrap the working yarn over your left index finger to form a 1.5-inch (4 cm) loop. Catch both strands behind the finger and draw them through the stitch, then yarn over and complete one single crochet. Practice until the loops face the outside and share one length.
Invisible decrease: Insert the hook through the front loop of each of the next two stitches, yarn over and pull through both front loops, then yarn over and complete the single crochet.
Before You Begin
Work all round pieces in continuous spirals without joining or turning. Mark the first stitch and move the marker after every completed round. Stuff gradually and keep the lower body firmer than the neck. Install safety eyes between Rounds 28 and 29, six stitches apart, before the head decreases.
Complete Crochet Instructions
Rounds 1–6: Build the Body Base
With caramel, work 6 sc in a magic ring. (6 sts) Increase in every stitch for Round 2. (12 sts) Work [sc, inc] six times for Round 3. (18 sts) Work [sc in 2, inc] six times for Round 4. (24 sts) Work [sc in 3, inc] six times for Round 5. (30 sts) Work [sc in 4, inc] six times for Round 6. (36 sts)
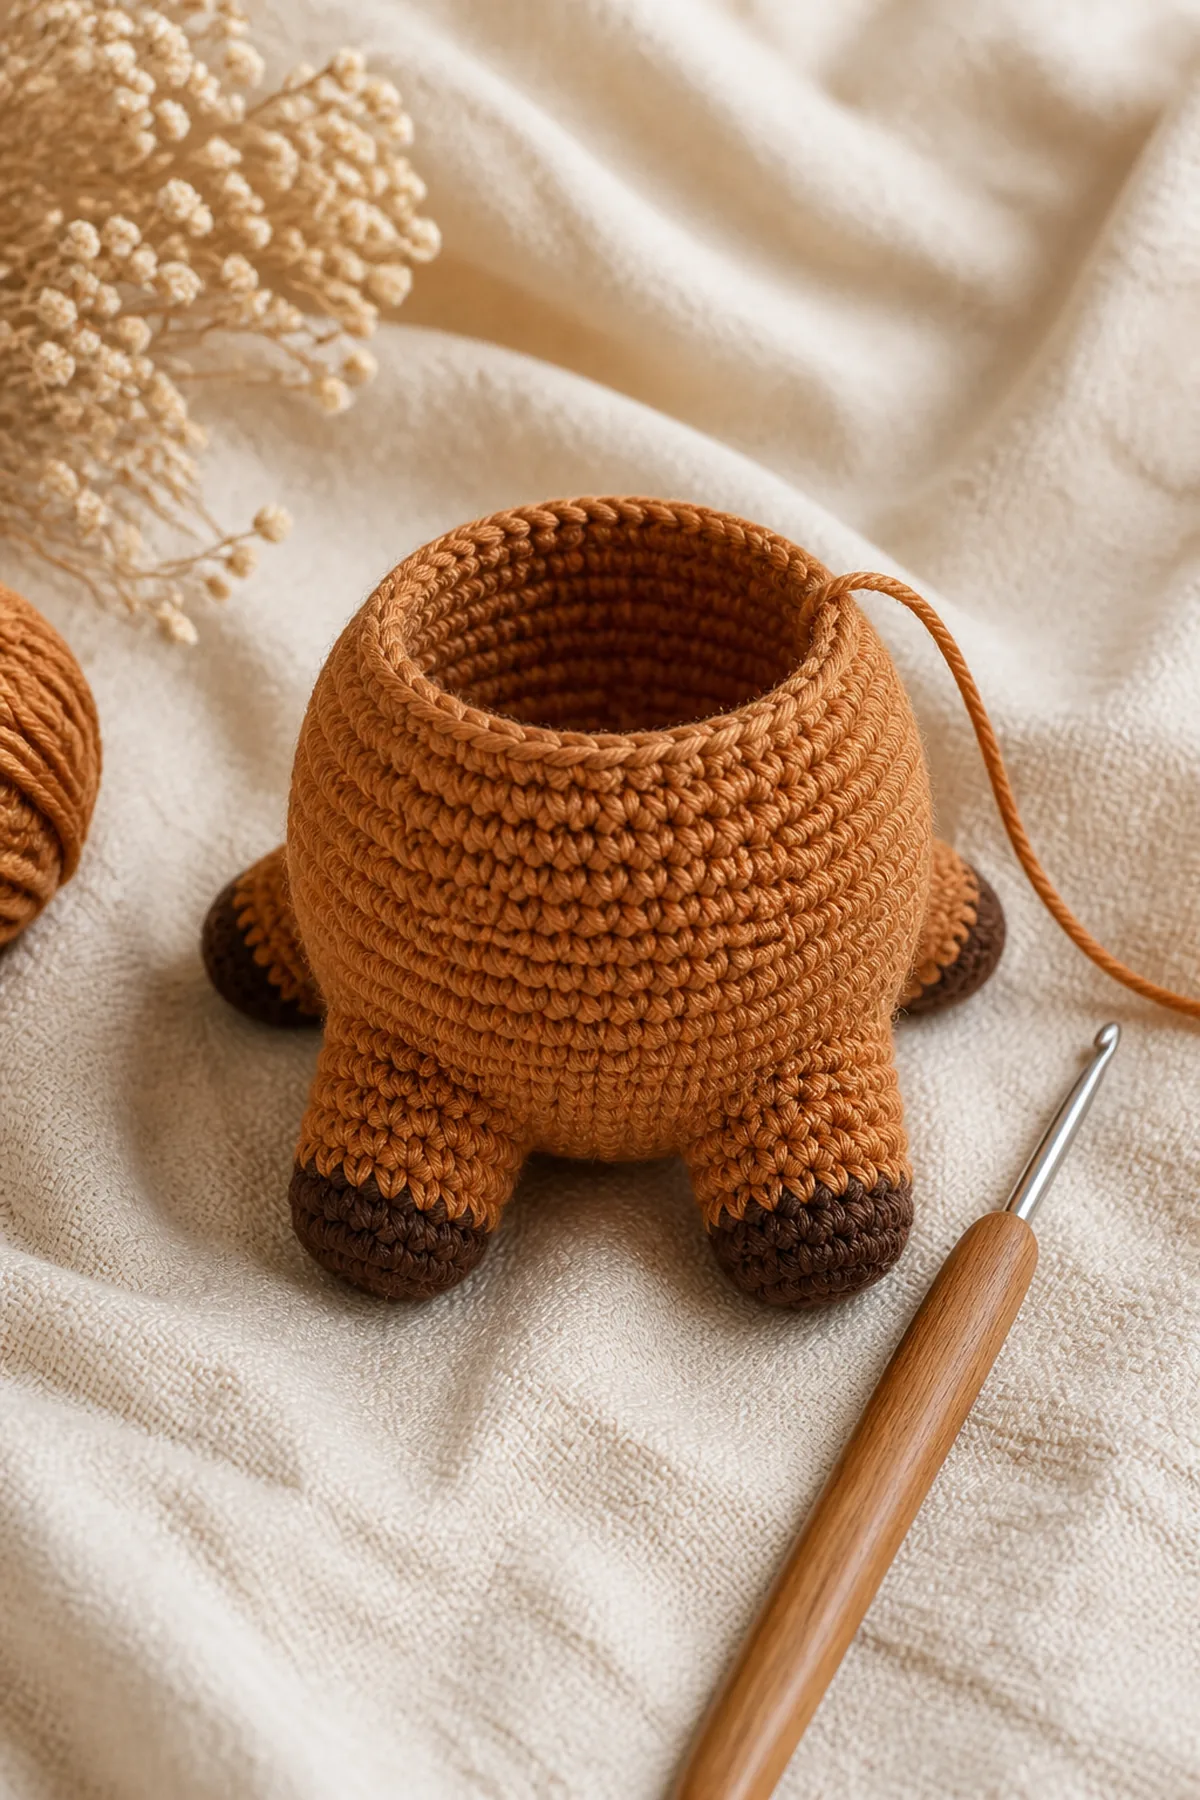
The base should form a smooth circle. Tighten the magic ring and add a small flat layer of stuffing after Round 10. Keep the marker at the center back so later facial placement remains easy to judge.
Rounds 7–21: Shape the Torso and Neck
Rnds 7–18: Sc in each stitch around. (36 sts)
Rnd 19: Repeat [sc in next 4 stitches, dec] 6 times. (30 sts)
Rnd 20: Repeat [sc in next 3 stitches, dec] 6 times. (24 sts)
Rnd 21: Repeat [sc in next 2 stitches, dec] 6 times. (18 sts)
Fill the torso firmly through Round 18 and more lightly through the narrowing neck. Distribute stuffing around the center instead of pressing one large ball against the fabric.
Rounds 22–36: Expand and Close the Head
Rnd 22: Repeat [sc in next 2 stitches, inc] 6 times. (24 sts)
Rnd 23: Repeat [sc in next 3 stitches, inc] 6 times. (30 sts)
Rnd 24: Repeat [sc in next 4 stitches, inc] 6 times. (36 sts)
Rnds 25–31: Sc in each stitch. (36 sts) Install the eyes between Rounds 28 and 29, six stitches apart.
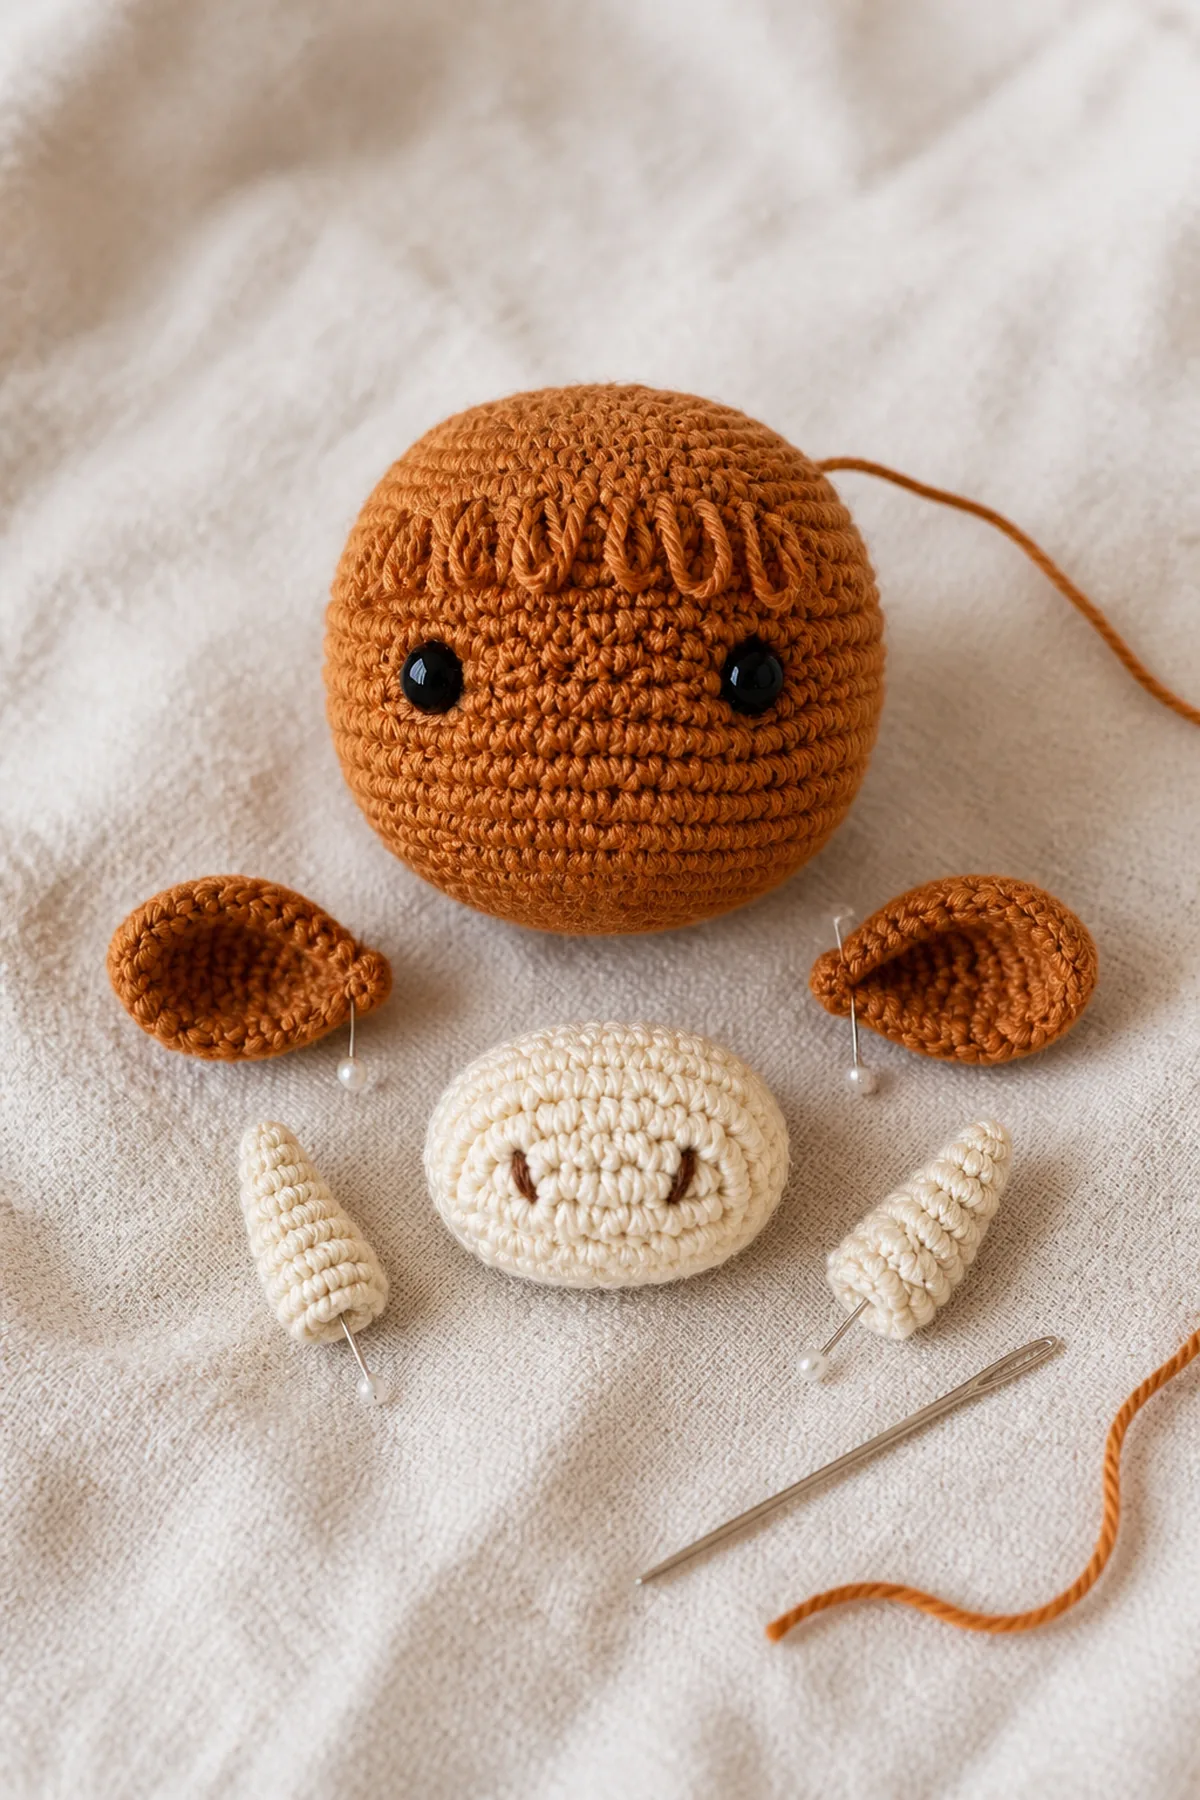
Rnd 32: [Sc in 4, dec] 6 times. (30 sts) Rnd 33: [Sc in 3, dec] 6 times. (24 sts) Rnd 34: [Sc in 2, dec] 6 times. (18 sts) Rnd 35: [Sc, dec] 6 times. (12 sts) Rnd 36: Dec 6 times. (6 sts)
Finish stuffing before Round 35. Cut a long tail, thread it through the six front loops, pull the crown closed, and bury the tail inside the head.
Make Four Legs
With dark brown, work 6 sc in a magic ring, then increase around to 12 stitches. Change to caramel and work five rounds of 12 sc. Stuff each leg to the same firmness and leave a 12-inch (30 cm) sewing tail. Pin the legs beneath body Rounds 5–9 in a rectangle, then view the cow from the front and side before sewing.
Make and Attach the Face Pieces
For the cream muzzle, ch 8, create an oval by working along both sides of the chain, and increase at both rounded ends until the outer round contains 30 stitches. Center the lightly stuffed muzzle over Rounds 26–31 and sew it twice around. Embroider two short vertical nostrils.
Make two oatmeal horns beginning with 4 sc, increase to 6, and work five more rounds at 6 stitches. Make two caramel ears around a seven-chain oval. Pin the horns across Rounds 30–33 and place one ear outside each horn. Sew every opening with small matching stitches.
Add the Highland Loop-Stitch Fringe
Join caramel yarn behind one horn. Surface-crochet staggered rows of loop stitches across the forehead, down both cheeks, around the neck, and across the upper shoulders. Keep the muzzle, eyes, ears, and horn bases visible. Use the first 1.5-inch loop as a measuring guide.
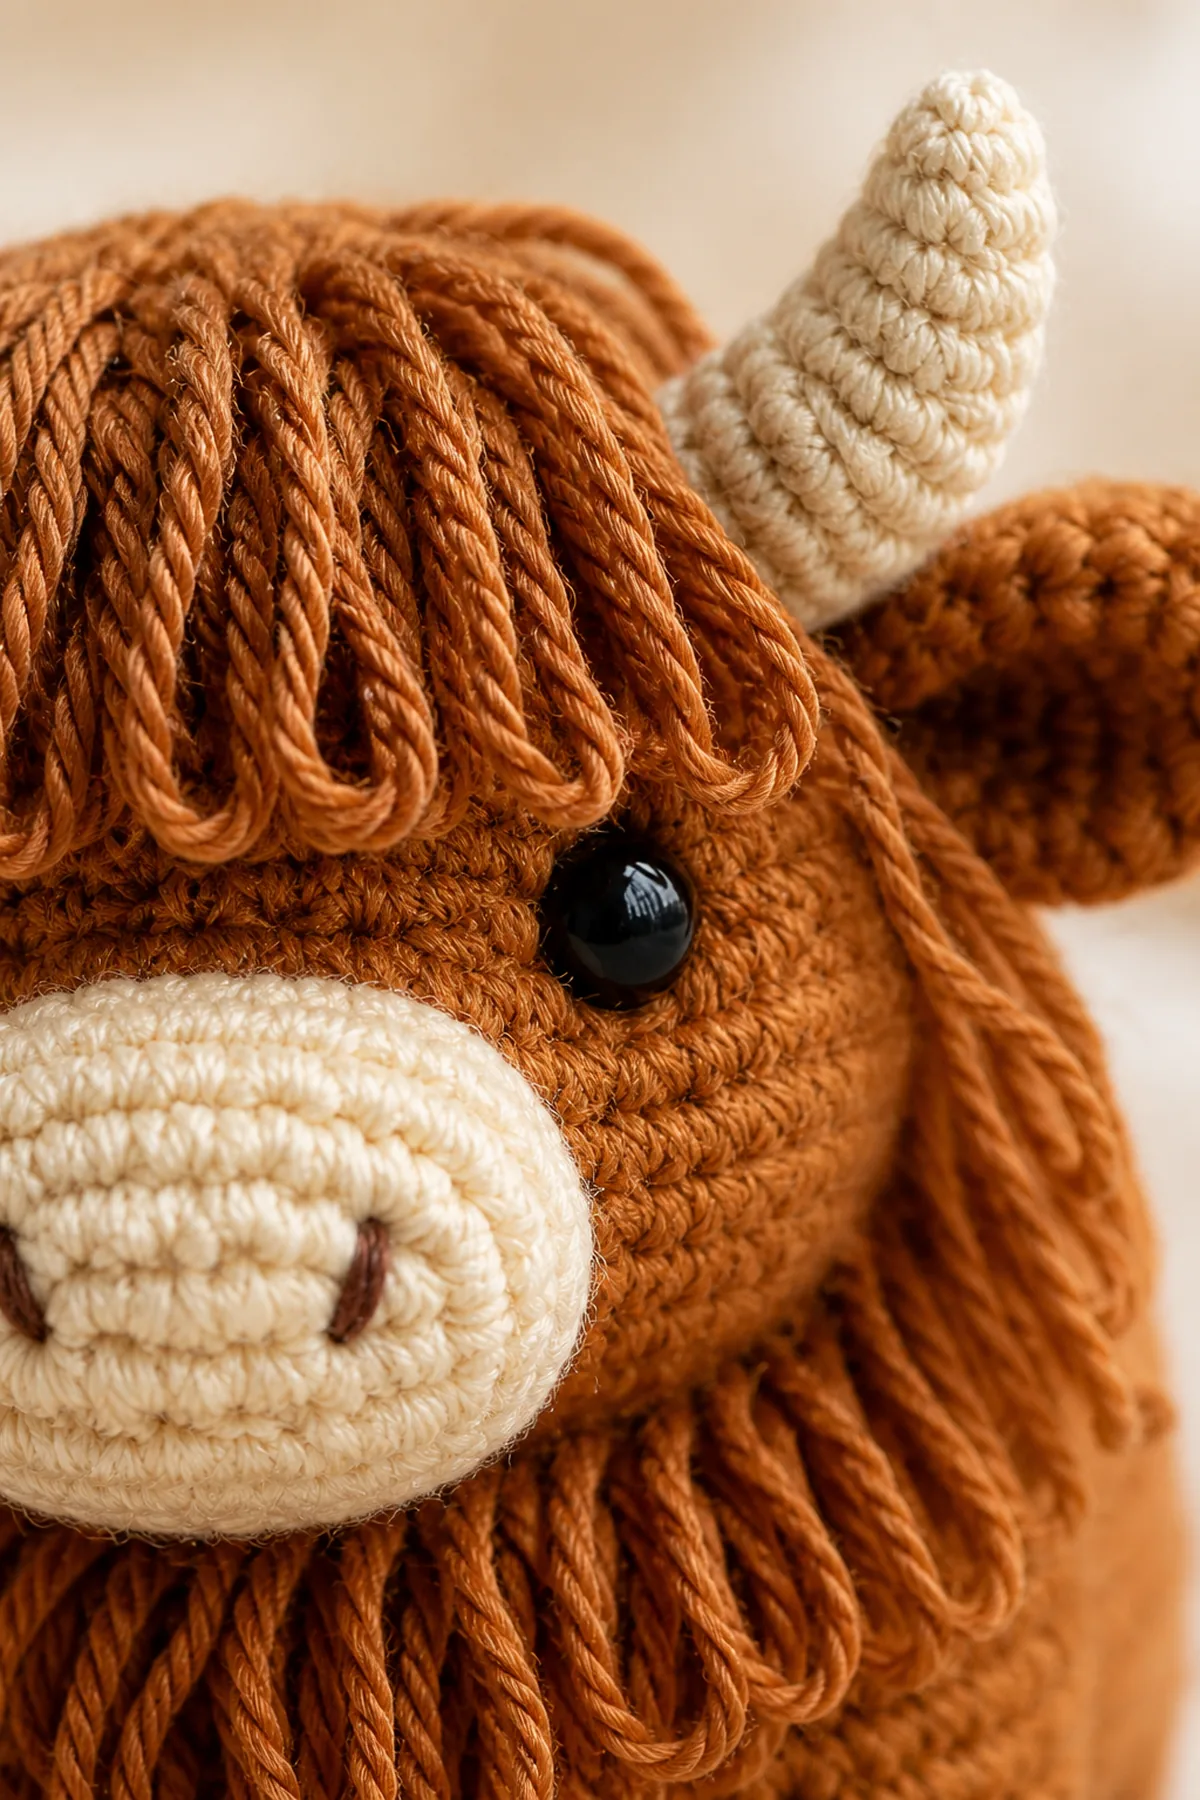
Fasten off each surface row securely and weave its tails under nearby caramel stitches. Separate the loops with your fingers. Trim only a few outliers; broad trimming can remove the natural shaggy texture.
Finishing
- Weave every structural tail through six matching stitches, reverse direction, and trim.
- Press each hoof against a flat surface and adjust the leg stuffing.
- Shape the muzzle and angle the horns evenly.
- Comb the fringe with your fingers and uncover both eyes.
- Inspect every attachment seam before displaying or gifting the toy.
Helpful Tips
- Keep the fabric dense: A 3.5 mm hook prevents visible stuffing.
- Match paired pieces: Finish both horns, ears, and each leg pair before assembly.
- Pin from two views: Check the legs from front and side so the cow stands squarely.
- Control loop length: Form every loop over the same finger position or narrow tool.
- Protect the face: Work surface rows around, rather than across, the eyes and muzzle.
Frequently Asked Questions
Can I embroider the eyes?
Yes. Work secure dark eyes between Rounds 28 and 29 before adding fringe. Embroidery is preferable for toys intended for young children.
Why will my cow not stand?
Confirm that the four legs share the same round count and stuffing. Re-pin them at matching positions before permanently closing the seams.
Can I use fuzzy yarn?
Use smooth yarn for the counted body. A textured yarn may be used only for the fringe if you can still anchor every surface stitch securely.
How do I make shorter hair?
Form each loop at 1 inch instead of 1.5 inches. Preserve the staggered rows and keep the length consistent across the coat.
Printable Highland Cow Pattern Card
Finished size: About 9 in tall. Hook: 3.5 mm.
- Increase body from 6 to 36 stitches over Rounds 1–6.
- Work Rounds 7–18 at 36; decrease to 18 by Round 21.
- Increase head to 36 by Round 24; work even through Round 31 and install eyes.
- Decrease to 6 by Round 36, stuff, and close.
- Make four 12-stitch legs, a 30-stitch oval muzzle, two 6-stitch horns, and two ears.
- Pin and sew all features; surface-crochet loop-stitch fringe last.
Conclusion
Accurate shaping, balanced assembly, and an even loop-stitch coat turn this crochet Highland cow amigurumi into a characterful handmade keepsake. Once the construction is familiar, adjust colors or fringe length while keeping the counted body and paired pieces unchanged.